

What you will need:
1. Swarovski flatback rhinestones NON-HOTFIX: size ss12 (3.2mm), ss16 (4mm) or ss20 (5mm) for this tutorial I have used ss16 rhinestones on a size 12 child’s converse trainer. View Swarovski rhinestones
2. Jewel setter: This is a plastic wand with a wax bud one side and pointed end the other, it makes picking up rhinestones very simple. View Jewel setter
3. Sand Paper / Emery board: You will either require a small piece of fine sandpaper or an emery board.
4. e6000 adhesive: This is an industrial strength craft adhesive that’s very strong, flexible, waterproof and clear in colour. It should be used in a well ventilated area with a mask for protection from the harmful fumes. View e6000 glue
5. Piece of cotton cloth / hanky: Cotton is ideal because it doesn’t leave fibres behind when you wipe a surface.
6. Orange stick: Small wooden stick used for pushing back cuticles.
7. Isopropyl alcohol (rubbing alcohol): Used for degreasing a surface by removing any traces of oil and grease and dries very quickly.
8. Converse boots / trainers / shoes: To add the crystals to.
Which adhesive should I use?
There are 2 adhesives that are mainly used for converse, Gemtac and e6000 both of which provide a strong bond when the surface is prepared correctly. For this tutorial I have used e6000 which is an industrial strength glue, but has very strong fumes with some nasty chemicals in. It’s thick in consistency so if you apply it too thickly crystals will get bogged under the glue and stay that way once set. Gemtac on the other hand is white when it’s first applied and turn clear when it sets. It’s also a lot thinner than e6000 in consistency so if there is a great deal of curvature on the surface you are crystallizing or it’s a vertical face the crystals can run down the adhesive especially if they are a bigger size crystals. To overcome this you can either leave the glue for a minute of two to thicken and then apply the crystals, or start from the bottom of the curve/slope and work upwards, that way the crystal have no where to slide to. Again with gemtac you have to apply the adhesive thinly or smaller crystals may get bogged down in the glue, if this does happen as long as the adhesive doesn’t go over the face of the crystals it will be fine as gemtac shrinks when it cures so self levels flat. Gemtac is also non toxic which can be helpful especially if there is a possibility of the shoe coming into contact with a child’s mouth.
What if I mess the glue / Crystallizing up?
If you are crystallizing the Converse toe and you do accidentally mess it up or it doesn’t end up looking as perfectly as you had hoped not to worry and this can be fixed. When e6000 sets its clear but if you try to pull away some glue or cut out an area that has gone wrong the glue tends to whiten and doesn’t look very nice, so its not advisable to try either of these methods. If you need to remove the crystals use an Acetone based nail varnish remover and gently wipe over the crystallized area and it will eat away the glue. Keep doing this and the entire glue and crystals will come away from the toe you can then wipe over the surface to ensure there is no glue left on there and leave it to dry. As regards the crystals carefully remove the adhesive from the crystals I use some cotton wool and apply the nail varnish remover to it. It may take a few minutes but you will be left with all your crystals as good as new and just a little adhesive and some time lost. Leave the acetone to completely evaporate before starting again!! Once it’s all dry you can start again from step 1 and hopefully you will get it right the second time ; )
If you have got a little adhesive on one or two of the crystals faces but otherwise you are happy with the result it’s not necessary to remove all the crystals. Make sure that its not just a little wax from the jewel setter first and if your sure that it’s not you will need a cotton bud and some acetone nail varnish remover. Dip the bud in the acetone and squeeze out all the excess so that it’s just damp and not dripping then gently wipe over the face of the crystals with glue on. I just make a circular motion around the crystal being careful not to touch any of the adhesive between the crystals. Do one or two circles around the crystal and then wipe away with a cotton cloth and the adhesive should be removed from the crystal face and the sparkle restored.
Preparation:
1. Place the Swarovski crystals on a surface faceted (shiny) face up. For the sake of this tutorial size 12 kids converse takes 100 crystals per foot (200 crystals in total)

2. Give the rubber toe surface a good rub with the sand paper / emery board to roughen it up. Once the surface has been prepared it will provide a much better platform for the adhesive to bond with.
3. i. Wipe the rubbery powder from the toe.
ii. With a Clean dust free part of the cotton cloth clean the surface of the toe with some alcohol to remove any grease, oil or dust. Because the fluid is alcohol it will dry very quickly and leave no residue.
Adding the crystals

1. Using the opposite end of the jewel setter apply enough adhesive to add half a row of rhinestones from the fabric to the tip of the toe. If you add too much adhesive it will dry before the crystals are added, so it’s better to add the adhesive in stages, especially if it’s your first time crystallizing footwear.


2. Gently touch the top of a rhinestone with the wax bud of the jewel setter to pick up a crystal (don’t press too hard or the crystal will get embedded in the wax). With the crystal selected place it in the corner point of the prepared / glued surface (again don’t press too hard)

3. With the orange stick press the crystal firmly into the adhesive and position the crystal to continue a row of crystals around the outer edge of the toe.

4. Continue this process add crystals to the adhesive with the jewel setter and then pressing them into the adhesive with the orange stick. (Add two or three crystals at a time, then position).

5. Once the crystals reach the top of the toe, add adhesive to the other half of the toe edge to complete the first row of crystals.

6. Its then a good idea to complete the crystals around the outer edge of the toe to give a clean edge to the design.

7. Continue adding rows of crystals until the surface is completely covered. NOTE: Having a few crystals of a smaller size is very useful to fill in any gaps where a larger crystal won’t fit. For this tutorial the gaps have been filled with ss12 rhinestones of which 4 in total were required.
8. Once the surface is completely covered, the crystals will likely look dull in appearance, this is because the jewel setter leaves traces of wax on the surface of the rhinestones, but don’t worry about this yet.
9. Repeat the process with the other Converse boot / shoe and once they are both complete leave them to dry for 15 - 30 minutes.
10. With the cotton cloth buff the crystals to remove any wax residue from the surface of the rhinestones, continue the process until the crystals are gleaming. This is also a good stage to ensure that the crystals are glued firmly in place, if any crystals do come loose, just use a small dab of adhesive and add a new rhinestone to fill the gap.

11. You should now have one completed pair of Swarovski Converse footwear, which will need to be left for 24 - 72 hours for the e6000 to fully cure before worn.
How many crystals do I need?
Each person will have their own way of applying crystals, some will place the crystals tightly together, while others will have slight gaps, below is a guide to the number of crystals used vs size from customer feedback. If you crystallize a pair of converse where the size isn’t listed please let us know so that we can update the table.
| Converse Size | ss16 per toe | ss12 per toe | ss9 per toe |
|---|---|---|---|
| UK Toddler size 3 | 0 | 97 | 3 |
| UK Child size 6 | 0 | 111 | 3 |
| UK Child size 7 | 59 | 6 | 0 |
| UK Child size 8 | 81 | 3 | 0 |
| UK Child size 13 | 100 | 3 | 0 |
| UK Adult size 4 | 156 | 0 | 0 |
| UK Adult size 9 | 0 | 255 | 0 |
Author: Crystal and Glass Beads
Other useful posts:
Swarovski All Star Converse Tutorial How to Crystallize Stars and Stripes
How to crystallize shoe heels


That’s a great step by step guide on how to set the crystals onto the show. I often wondered how to do it considering how small the crystals are. I would have tried doing it with my fat fingers and I’m sure I would have got glue all over them 😉
Hi Sire
Have the same problem with big hands, but the small jewel setter tool made life much simpler or I just wouldn’t have been able to pick up the crystals with my fingers.
In trying to figure out how many crystals would it take
To cover a kids converse size 3. Pls help anyone
Hi Nikita
If it’s to cover the toe based on customer feedback it would be between 40/60 x ss12 crystals Per Toe. If you are able to advise the exact number per toe once you have completed the converse I will update the chart for future blog readers.
Hi how did u get sneakers gold
Hi Tecia
The Converse came in the gold colour and for the toe we used gold marker and gold crystals.
What size crystals for a woman’s 10 shoe
Hi ss16 would be the most economical and look good, ss12 will give a sparklier finish but take up a lot more crystals and hence cost more.
Wow! This is such a great idea and tutorial! The shoes turned out to be great, they look luxurious! Are you sure that the glue would hold even if it rains outside?
Hi Virag
The adhesive is pretty strong stuff (industrial strength) and has no problems with getting wet.
So glad I found this, purchased your recommendations and followed your very easy instructions and now have a very bling pair of converse! Many thanks…more creative posts please:)
Hi Verity Glad you found the post useful and the converse turned out well, will add more posts for tutorials and tips which hopefully will also be useful.
Do you use the same size stones on the toe part?? Thanks 🙂 I’m dyin to get started on mine x
Hi Nicola
You can use ss16 on the toe and they work fine or if its a smaller shoe ss12.
GREAT tutorial!! First pair done and easy!!!
My problem is that I just realized the 2nd pair of converse I bought (camo converse) don’t have the rubber toe but r canvas there just like rest of shoe, but thicker, like the rubber toe is under there and just covered. Can I use the e6000? Or do u know what would work?? I appreciate it and thank you for this tutorial, Bonnie
Hi Bonnie
Glad you found the tutorial useful. Yes you can use E6000 on canvas, the only thing you need to be careful of is if the toe buckles frequently then the crystals may come loose. For areas that buckle studs tend to be more secure.
Hi, me again 🙂 You lost me, so use studs instead of crystals? Or r u referring to Prongs??
Thank you thank you!!!
HI Bonnie
Crystals are the most suitable for converse, but if they keep coming loose you can use a setting which goes behind the material and prongs keep the crystals in place or you can get sew on crystals. The crystals do look better if they are glued on though as you cant see any setting or thread. There is also a glue called Shoe Goo which use can use like e6000, but may give you a thicker base of glue for the crystals to sit on.
how many crystals would i need and would the also stick to fabric
HI Carly
It will very much depend on the shoe size, for the ones on the blog which are children’s it only took 103 crystals per shoe, but for an adults shoe it would take 200 + crystals per toe depending on the shoe size.
Great tutorial. What size of crystals would you suggest for baby converse? Thanks
Hi Sheena
I would think ss9 which are used for mobile phones would be the best size, I would be very careful that the rhinestones are firmly secure as if swallowed they could choke a baby.
teresa
very good tutorial do u have a tutorial for glueing to trainers on the nike tick ect thanks
Hi Teresa
It would be the same principle, but just work around the edge of the tick to start off with then fill in the inside. It would be useful to have a few smaller crystals at hand for any gaps where the crystal size you are using is big.
Hi, can’t wait to get started on mine!
Couple of questions: would you say e6000 is the better glue to use or will gem tac work just as well?
Also what size crystals and roughly how many would I need per shoe for an adult size 6?
Thank you!
Hi Alex
e6000 is stronger than gemtac as its an industrial strength glue and provides a better bond to plastic. The ss16 4mm are a nice size crystal and easy to use, at a guess I would say about 250-300 crystals per toe, the ones on the blog were for a child’s shoe and it took just over 100 crystals per toe.
hi just purchased the crystals cant wait to get started, just 1 question…..can u wash the converse in machine with crystals on or will they come off??
Hi Emma
Yes E-6000 is machine washable once dry but the banging around in the machine may damage the crystals, I would try putting them inside a pillowcase on a low temperature wash in with towels to cushion them against the side of the machine. Have washed trainers a number of times in the machine and you just get a constant banging against the side of the machine, so better to add some protection. As regards drying them afterwards if you put them in the dryer they can shrink because of the heat so its better to stuff the inside with socks or newspaper in a bag (wet newspaper may stick to the canvas also print can come off a plastic bag so turn inside out) to keep their shape and let them dry in the airing cupboard or a warm place. From past experience the heat damaged the glue holding the soles of the trainers on so they had to be re glued after tumble drying. You can also wash them in the sink with an old toothbrush and scrub gently with warm water which works quite well, the colour of the canvas won’t fade this way as it can in a machine wash.
Hi. Do you use clear or ab clear gems? Thanks.
Hi Adele
The Clear crystal are used in the tutorial, the AB has a lot of pinks and purples and silver in the crystal, which don’t look as nice on the converse as the clear.
What if the glue gets a bit messy onto the rhinestones? Can you use something to wipe it off after? I find the glue is rather thick so spreads as I press the rhinestones down?? Help!
Hi Melessie
You can wipe the glue off the crystal straight away, the trick in getting it right is not to apply too much glue in one go, just a small area and spread the glue out with the end of one of the jewel setters (so that its not too thick), then use the other jewel setter to pick up the rhinestone and place into position, you can then press down if need be on the crystal with the back of the clean jewel setter you are using to pick up the crystals. If the glue is applied too thickly it will squelch out around the crystal when you press down and cover the faceted face. Its worth practicing with a small amount of glue on a piece of card to get the right amount of glue for the crystals, which I did when I first used them.
Ok thanks very much for your help, I will practise this first then and not use as much glue!
hi ya i ahve tried doing these for my daughter i used gem tac and my daughter had them on one day and half the crystals came off does this happen with e6000???? thanks
Hi Gemma
No the e6000 is a lot stronger, you just need to take care of the fumes and its worth prepping the surface (rubbing down with emery cloth) before using the glue to give a better bond between the glue and rubber toe.
Hi can you use hot fix rhinestones on the shoes? Whats the difference in strength with the e6000
And hot fit rhinestones if using hotfix tool? Is there a different way of doing this?
Hi Becky
Hotfix crystals generally won’t last very long on shoes as the adhesive is meant for fabric or paper which it does a good job of bonding to. With e6000 it’s an industrial strength glue which means that it provides a very strong bond, it’s also flexible so the adhesive is able to flex and absorb impact if the crystallized area of the shoe is bent or impacted, the downside of e6000 is the fumes. If you look at our Post about glue then there are alternatives to e6000 if you would like to try a different adhesive. Hope this helps. http://www.crystalandglassbeads.com/blog/2012/swarovski-crystals-flatbacks-glue.html
hello, i love this!! i cannot wait to give it a go 🙂 just checking can i use the foiled flat back crystals?
Hi Sherry yes it’s the non-hotfix crystals foiled back, which the clear crystal seen to be the most popular.
were do you get the we stone things you stick on to the toe bit
Hi Becky
We sell the crystals on our main site http://www.crystalandglassbeads.com/19-nhf-swarovski-rhinestones the ss16 clear crystal are the size and colour used for the tutorial.
Wow i love this idea - am in the process of ordering some converse shoes now so i can get creative! do u think the E6000 would work on the back of the shoe too? (i want to make them extra shiny!)
thanks.
Hi Kelly
E6000 will stick to the back of the shoe also, but you will have to use a little more adhesive on the canvas part than you use of the rubber toe.
ok. getting nervous now as ive just added it up and it comes to more than i thought and im worried im going to mess it up!
sorry me again, in your opinion, do u have to use swarovski crystals or would any crystals work the same? (this is my last question!)
Hi Kelly
You can use any crystals and it will work just the same, but if you use plastic crystals they won’t look as sparkly.
hi there, ive tried to use the e6000 glue on my freshly washed converse. when i tried to apply it, the glue seemed really thick and just seemed to not want to stay on the rubber part of the trainer!!! help? should i prepare the trainer by using sandpaper first? will this make the glue stay on the trainer instead of coming off? (it just seems to peel off as i apply)thank you
Hi Emma the e-6000 is very thick but should stick to the rubber, its likely that there is a thin layer of detergent coating the rubber from the wash cycle, giving it a light rub with an emery cloth/very fine sandpaper and remove any grease afterwards with alcohol or something similar and it should stick nicely.
hi i was wondering if you had a step by step to make hello kitty or leopard print please or if you know where i can find one
thank you x
Hi Stace
I don’t sorry but will try and do a tutorial next month when we get some smaller ss9 crystals in colour to create art on a mobile phone or DS size gadget.
Hi,
How many crystals do i need for the rubber toe bit on size 6 converse?
Hi Megan
If You measure the dimensions of the toe and send a pic I will create a template and give you a pretty accurate guide of how many crystals you need. The Converse in the tutorial took 103 crystals per toe for a size 13.5 Child shoe so at a guess I would say approximately 200 crystals per toe.
Hi Khaled
I have been trying my hand at crystal toes and heels, but am using E6000 and Gem Tac with hotfix crystals. I am not using a hotfix tool, just the glue, but wondered if the adhesive backing already on the crystals would affect the end result? Love this and look forward to more tutorials! x
Hi Chrissy
It will certainly work but with hotfix crystals they have the crystal faceted face then a foil backing and a primer layer to bond the hotix glue to the foil back, so the bond you have will we with adhesive on adhesive as opposed to the foil backing which would provide a stronger bond. Also hotfix crystals are more expensive, so you can used them but I would opt for non-hotfix given the choice.
Hi, can you use a glue gun to apply these?
Hi Suzi
Generally the glue from a glue gun wouldn’t be suitable for bonging rubber and crystals together, but you can check with the glue manufacturer/supplier to be certain.
I have just ordered size ss16 non hot fix Swarovski crystals to put on the toes of my size 5 converse hoping the crystal size is ok! Can’t wait to get started!
Hi Gina
The ss16 is the right size, its nice and easy to do just need a little patience 🙂 if you let us know once its complete how many crystals you use per toe, I will put a chart together on the post to show how many crystals each size shoe takes.
Hi khaled
I have just finished my converse, they were actually a size 4 not 5 as I originally stated, used roughly 110 ss16 crystals on each toe, can’t wait for them to dry!
Hi Gina
Thank you for letting me know, I will put a chart together outlining the number of crystals required for each shoe size.
Hi me again I was wondering do u kno what size crystals I would need to do iPhone 4s phone case down the sides and the apple sign? I have 4mm and 3.2mm crystals ATM x
hi! i recieved my crystals from you the other day but have just read the tutorial again and realised i havent got any Isopropyl alcohol (rubbing alcohol)- where do you buy this stuff from?
Thank you, Kelly
Hi
It’s a standing joke amongst my friends that I never have my Converse off my feet. I am getting married soon and as a surprise element I want to completely cover a pair of Converse in crystals to wear on my wedding day! Do you have any idea roughly how many crystals I would need and would the glue you recommend be suitable to use on the canvas areas? Thanks
Hi Cheryl
Congratulations on the big day. I don’t have an idea of how many crystals it would take to completely cover a pair of converse sorry, I would guess 2 factory packs per shoe which is just a guess, but I’m sure if you work out the surface area you would have a better idea. The e6000 adhesive would work fine for both the toe and canvas area of the shoe. It might be an idea to use 2-3 different sizes and randomly place the different size crystals all over the shoe with gaps between the crystals (so the pattern isn’t uniform), which will make them very sparkly but use up a lot less crystals than covering the complete shoe in row after row of crystals. The crystals will also likely stay on the canvas area longer this way as when the canvas buckles the crystals wont be pressing into their neighbour as there will be a gap between them.
Hi I am fixing to do this on my daughters converse they are infant size 4 do you think the 4mm would be too big or ok?
Hi Ashley
You can use the ss16 but the ss12 which are slightly smaller and will allow you to add more crystals to give a sparklier effect.
and would u suggest 2028 or 2058? Thank you!
Hi Ashley
The 2028 has been replaced by the 2058, so most crystals you get now will be the the newer shape 2058 unless its a colour that’s less popular where 2028 crystals may still be in stock. The clear crystal tends to be the most popular and the crystals will be 2058 the new shape.
Can I use the hot-fix crystals on shoes with the professional touch adapter?
HI Sonia
If the shoes are made from a fabric like wedding shoes you can use the applicator if it’s for converse I would recommend non hotfix and adhesive as the hotfix glue isn’t suitable for rubber, plastic or leather.
Hello, I have ordered 300 SS12 and 300 SS16 of you to make myself a iPhone 4s case. But am now wandering weather I should have got smaller sized crystals. Could you recommend what size to use for such case? Have you done a iPhone case before?
Sam
Hi Sam
ss9 are the most popular size crystals for an iPhone case, both ss12 and ss16 would be too big for an iphone case.
Brilliant step by step guide and worked a treat for me 🙂 x
Hi Raquel
Glad you found it easy to follow.
what size gems would you use for a size 3 adult shoe, and how many would you say?
Hi Larissa
ss16 which are the 4mm rhinestones approximately 105-110 per toe and 2-5 ss12 rhinestones per toe to fill in the gaps. If you don’t place the crystals tightly together you can get away with using just one size and space the crystals out but if you want a nice professional finish it usually takes a few smaller crystals just to fill in the gaps which is what the ss12 rhinestones are for. Once you complete your Converse I would be grateful if you could let us know how many crystals you use so that I can update the chart for a size 3 shoe. You can find the different sizes here http://www.crystalandglassbeads.com/19-nhf-swarovski-rhinestones If you get stuck just give us a call and I can talk you through the process.
Hi! Thanks to this fab page, I just completed ladies size 8’s! I used 158 ss16’s per toe so I ordered 350 and have 35 left over for any that fall off : )
Hi Kitty
Glad you found it useful and many thanks for the feedback, have just updated the chart. Fingers crossed they will all stay on.
Hi need your help I want to do apair of converse for my littlegirl she is child size 8? What size crystals do you recommend and also want to do some for me adult size 6 what size crystals for mime?
Thank u
Hi Nicola
You can use the ss16 crystals for both yours and your daughters Converse with ss12 to fill in the gaps of which there will only be a few. The pink converse in this tutorial are a child size 13 so for a child size 8 it would require a few less rows of crystals, if you want to get more crystals on the toe you can use an ss12 size for the main crystal and ss9 to fill in any gaps if required, but I wouldn’t go smaller than this. You can find the crystals here
Hiya, fabulous tips for the converse! I have done my best friend a pair as a surprise but I seem to have got some of the e6000 on the stones and they look dull, is there a way to clean them up? They are actual swarovskis xx
Hi Lyndsey
You can use a cotton bud with some acetone on to apply to the crystal face which will soften the glue just in the area you require and use a scalpel or sharp knife to gently remove the offending glue. Make sure the knife is very sharp so that it cleanly cuts away any soft glue on the glass surface you are removing and doesn’t tug/ pull at the good glue, or you will find that the crystals will get pulled away stuck to the glue and the end result will be a mess.
Hi. Ive currently been puttin rhinestones on the toe of converse. Now I want to start attaching them to the material of the shoe. Which is the best way to stick them on??
Hi Karla
You can use e6000 just the same, may be easier to use a syringe to apply the glue to one crystal at a time if you are creating a scatter effect and don’t want to see the glue around the sides of the crystals. I would test the strength of the bond first by adding a few crystals and let them dry to see if you are applying enough adhesive. Because e6000 is flexible it will bend with the canvas as it creases, but if there isn’t enough glue between the canvas and crystal the crystals will come off. If you still find the crystals come off you can also add a small dab of glue to the canvas let it dry and then add the crystal with e6000 to the glue spot which may provide a stronger bond, so it’s glue on glue. The other option is to use crystal studs with prong backs which you pierce through the canvas and then bend over, but it can leave sharp edges inside the shoe if the prongs open up.
Hi Khaled, great site and very clear instructions.
I’m going to give it a go with an arts and crafts class I run.
One question, can I do this on a childs pair of fabric ballet shoes and if so, which glue would you recommend.
Many thanks.
Hi Louise
Yes you can add the crystals to a child’s fabric ballet shoes where you have a choice of adhesives there is Gemtac glue, which is easy to use, dies clear and is non-toxic, e6000 which is an industrial strength glue, dries clear but has strong fumes or GS Hypo Fabric Cement which also dries clear and is a medium strength adhesive with a very fine applicator nozzle. Whichever glue you use don’t use too much on the back of the crystal or the glue will splodge out of the sides when you press the crystal onto the fabric and you will see it especially if its a satin or similar material shoe.
Ok I’ll try that thanks. Also do you think using the hot-fix rhinestones would work using the applicator to attach them or not??
Hi Karla
Hotfix would work fine on canvas, heat up the crystal and watch to see the glue change colour/soften then press onto the canvas and should give a good bond.
Hi,
Do you have any tutorials for Iphone or Blackberry cases they are very popular at the moment.
Eva
Hi Eva
Have ordered a case which should hopefully be here in the next few days once it arrives I will get a tutorial done.
Hi Khaled, can’t wait to see the phone case tutorial,as I’ve had lots of customers making enquries with me and I’ve turned down the business because I simply have no idea where to start with bling phone cases.
Keep the good work up and many thanks
Eva
Please put something on FB when tutorial is done as I will see that before I go onto your website.
Thanks
Eva
Loved this! Soooo helpful as I’ve been wanting to buy a pair of ‘bling’ converse to change into at my wedding. Now I’ve created them for myself and can’t wait to show them off! 🙂 Thank you!
Hi Jen
Glad it helped, hope all goes well on your big day.
Hi I’ve just bought some 0-3 month converse. What size crystals do you recommend
Thanks
Hi Vicki
ss12 would be a good size.
Thanks so much for that tip it totally worked! I have another friend who wants her size 6 converse done full toe caps, how many would I need in ss16 or ss14? And which size In your opinion would look best? I’m using the e6000, would you say this is the best glue? The seller states they are genuine swarovskis and they are gorgeous so I’m pretty sure that they are? Xx
Hi Lyndsey
The toe on a size 6 would take approximately 155 crystals per toe, the ss16 is a nice size but there really isn’t that much difference between the ss14 and 16 so either can be used it will just take a few more crystals with the ss14 that’s all. We have both the ss14 and ss16 crystal which can be found here If you do use the ss14 please let us know how many you use and I will amend the chart on the page to show the amount of ss14 crystals required per toe.
Hi. Can you use E-6000 glue on the rubber toe bit on converse shoes? And how many swarovski crystals will i need for a size 5 pair of lo converse
Hi Stephanie
E6000 is the best glue for Converse trainers for size 5 converse it will take approximately 123-155 crystals if you find the Lo Converse toe takes slightly less or more please let us know so that I can update the chart.
would you recommend using ss16 on all size converse? or what size would you recommend for UK4 thanks
Hi Rebecca
Yes ss16 are a nice size not too big or small and they are simple to use.
Hi, When you apply the glue do you just put it on directly onto the shoe or do you use something to put it on with?
Hi Jess
I use the back of the jewel setter, but you can use an orange stick or something similar, apply a small amount and spread it over a large enough area to attach a few crystals at a time. If you apply too much adhesive then it will harden before you have a chance to set the crystals in place.
Is gem tac any good x
Hi Carrie
The Gemtac can be used for the canvas part of the shoe and will provide a strong bond, but as regards the toe its not as strong as the e6000. The main problem with the gemtac is that although it does provide a good bond but if it starts to come free all the crystals can be pulled off in a sheet, where as the e6000 doesn’t have that problem.
hi…could i use gemtac to put crystals and larger embellishments on a plastic phone case please,i dont really want to use the strong vapour glue? thankyou
Hi Hannah
You can use gemtac but it wont last as long. I’m doing a tutorial which should be on the blog by Sunday for an iphone case and have tried GS-Hypo Cement this time where again it provides a reasonable bond but neither are no where near as strong or long lasting as e6000. If you are worried about the fumes you can get a mask from B&Q to protect against vapour chemicals and you wont smell anything. Which is what I’m using whilst doing the tutorial.
ohh thankyou could you tell me the exact filters you use please for these masks and would you need anything to protect your eyes because my eyes got very dry and sore when i used e6000 last time .thankyou for your advice xxx
what size and how many crystals do i need for baby converse?
thanks
Hi Sparkle
ss12 are a nice size for baby converse as regards how many it would depend on the size, but a child’s size 13 converse only takes 100 ss16 so it will probably only be half the amount in an ss12. I would be grateful if you could let me know how many you use so that I can update the chart for baby sizes also.
Where can you get the rubbing alcohol???
And what’s better sand paper or emery board??
Thanks 🙂 xx
HI Abbie
You can order rubbing alcohol online and I use a medium grade sandpaper for the toe but an emery board will do the trick its just to rough up the surface slightly to give a better bond for the crystals and adhesive.
Just done some size 2 crib shoes in ss12 and it took me just under 100 crystals
Hi Vicki Many thanks will update the chart now.
What would you recommend for a toddler shoe size though? Ss12 or ss16 or is there something in
Between? Thanks 🙂
Hi Vicki
Either ss12 or ss16 will work fine, there is also ss14 between the two sizes (can find ss14 flatbacks here). Its pretty much down to the look you want ss12 is slightly smaller so will allow you to get more crystals on the toe than using ss14 or 16 crystals, but any of them will work fine.
Thanks for the help 🙂
Hi I was just looking for a bit of advice on the best way to cover a whole pair of vans trainers in crystals what size and colour would u recommend and what’s the best way to go about applying them? I’ve never done anything like this b4 so don’t want to make a mess. Im looking at covering white trainers with clear crystals but I know you can buy foil back would these b the best? How many do u think I’d need for a adult size 7? X
Hi Alex
Clear crystal would probably give the nicest effect as regards crystals to use it would be the foil backed crystals where the easiest way would be to use a range of sizes to create a random pattern which you can use ss9, ss12, ss16 and ss20. By creating a random pattern you don’t have to worry about following a set line of crystals or the lines going wonkey as you are going along the shoe. You can leave a slight gap between the crystals of a few mm or put the crystals close together, if you see our last shoe tutorial you will get the idea view shoe tutorial. As regards adhesive something like Fabri-Tac would likely give a strong bond as the material is usually 100% cotton canvas, you can see Fabri-Tac on Beacon Adhesives chart here the other alternative is e6000. If you are applying the crystals with a small gap then a syringe would be a good idea for precision application so that you don’t get the glue around the side of the crystals You can follow the shoe tutorial and just substitute the adhesive, make sure to only put a small amount of adhesive in the syringe and top up as required so that you can empty the syringe after use so that you can use it again. As a rest I would put a few crystals across the crease of one of the toes on the shoe, let it dry for 24 hours and then wear the shoes around the house for a few hours if they don’t come off the crease which is the part of the shoe where the canvas is under most stress then they will be pretty secure everywhere else. Hope this helps I will be doing some comparisons over the next few weeks for various materials and adhesives and will post the findings on the blog. I’m unsure how many crystals it will take but you will be looking at at least a wholesale pack of crystals in the 2 main sizes you choose along with a few small packs of the other 1 or 2 sizes.
Hi there, would you please be able to tell me how many diamonds I would have to use for a size 6 adults converse with size Ss12diamonds?? Even an estimate would help thank you.
Hi Lara
I would guess approximately between 160 and 195 crystals per toe (based on how many ss16 customers have used to cover an area), I would be grateful if you could let us know the exact figure once you complete the shoe so that I could update the chart.
Hi, I was just wondering what size crystals you would recommend for a size 8 toddler converse. Also a rough estimate of how many I would need. Thanks
Hi Tasha
Have just updated the chart ss16 fit nicely with one or 2 ss12 for any gaps or you can used ss12 with ss9 for the gaps. For a size 8 you would need 81x ss16 crystals and 3 x ss12 crystals for the gaps or you can space the ss16 out slightly so that you don’t need the ss12 crystals.
Hi I’m sorry I am sure this question has been asked already. How many crystals and what size for a toddler size 7. I would like the crystals to be close together. Thank you!
Hi Abigail
ss7 Child’s converse would take approximately 59 x ss16 crystals and 6 x ss12 crystals per toe to fill in the gaps so they give a nice compact effect.
Hi, would like to ask please where can I promithefto gems swarovski large quantities … we are looking for long …. I would like your help .. Thank you, Mr POST!
Hi Xenia
We sell the crystals in larger quantity you can find a link to our shop at the top of the page, If you are looking for colour crystals just give us a call and we will check to see if we have in stock.
Hi, would you be able to tell me (or give an estimate) on which size crystals and how many would be required to crystalize an adult size 2 pair of converse? Thanks.
Hi Chelsea
ss16 are a nice size it would take approximately 105 ss16 crystals and a few ss12 crystals if you want to fill in any gaps to keep the crystals tightly together.
Hi,
I have a size 3 adults converse and i want to bling the toes and back of the shoes can you tell me which size crystals i use and how many i would need? Also i can i purchase the glue and the crystals from this website?
Thanks
Sarah
Hi Sarah
ss16 are a nice size and you would need between 105 and 110 crystals per toe and then a few crystals ss12 just to fill any gaps where the ss16 wont fit. We sell in wholesale packs or small packs of 100 along with the adhesive and jewel setter which you can find the flatbacks here along with the adhesive. As regards the back of the shoes to cover the strip running up the back would take approximately 100 ss16 crystals edge to edge or the ss12 would leave a slight gap each side of the crystals running up the strip at the back of the converse.
hi im looking at making these sparkly converse were is the best place to get the crystals from for a fair price?….
Hi Vicci
We sell the crystal on our site where you can have a look to see if your happy with the price. click here for Flatback crystals
I want to customise a pair of size 8 mens Nike high tops by putting crystals on the ticks. What would you recommend I use? And how many crystals would I need?
Hi Matt
Will try and do a tutorial this weekend for the Nike tick, I would have thought ss5 or ss7 crystals would be the most suitable, if you can measure the tick can give you a rough guide on how many crystals you will need.
Hi, at a guess do you know how long it would take to fully crystallise a pair of adult hi tops? I’ve heard some people say it takes a whole day. Also how many 4mm crystals would I roughly need?
Many thanks
Hi Danielle
What size are the adult high tops? and are they the ones that come just above the ankles with 7/8 rows of lace holes or other?
Hello i was wondering what size and how many stones i would need for adults size 5 converse
Also do u need the rubbing alcohol ?? 🙂
Hi Jordyn
You would need 120-150 x ss16 crystals per toe or approximately 215 x ss12 crystals per toe, depending on which size you prefer to use. The Alcohol is just to wipe away any grease/dust from the toe, if you don’t have and the toe is grease free you can just use a damp cotton cloth/tea towel to remove any of the dust created from rubbing the toe down and then leave to dry before adding any crystals. Don’t use a tissue to wipe the toe as it will leave fibres which will stick to the glue.
hi,approx how many would i need for an adult size 6? they are 3mm?
Hi Amy if you are using the ss12 crystals I would guess it would be approximately 230 crystals per toe and for the ss16 (4mm) approximately 150 crystals, once you have completed them please could you let us know the exact number used and I will update the chart for size 6.
How can I stop beads falling off the shoe after a few months???
Hi Abbie
What material is the shoe made from and what adhesive and crystals did you use also how did you prepare the surface before adding the crystals?
Hi I want to make these 🙂 but im a size 7 adults and just found some swarvoski crystals online but do not know what size to order, would you be able to advise me. And also what glue should be used?
Hi Leanne It would be the ss16 flatback crystals here or the ss12 flatback crystals. I have used the ss16 in this tutorial and you can see in the American Flag Converse tutorial the stripes are in ss12 to see the difference. E6000 would be the strongest glue.
Hi I have done two pairs on pink converse with the rhinestones on, can I wash them in the washing machine? Thanks Sam
Hi Sam
The crystals usually come loose from bumping into the side of the drum, so if you intend to put them in the machine first put them in a pillow case and in the middle of a load of towels to cushion the crystals from the machine side and wash on a cool temperature. Don’t use a powder that contain a bleach as its not good for the canvas. Washing in a machine will usually lighten the pink colour so if they are not too dirty the Converse material can be cleaned with soap water and a tooth brush or a sponge for the rubber, this method can also be used for remove a stain prior to the trainers going in the machine. Once you have washed the trainers leave them to dry on the line naturally don’t put them in the tumble drier as the heat will damage the trainers. Hope this helps.
just want to say this is an amazing tutorial and helped me loads!!! im looking to do this for my friends 21st birthday and also write her name on the side of the converse (size 5) on the fabric, just wondering what size you would recommend and would you use the E6000 glue? thank you!
Hi Joanne
Yes e6000 would be good for the canvas, you just need to make sure that you hold the crystal in place while the glue bonds for a few seconds, then remove any glue that splodges around the sides of the crystal. I should be putting something up for writing your name in crystals either today or tomorrow and will show the different ways of going about it, the best result will always be with different size crystals but have a look at the blog/facebook page over the weekend and it should help and any questions just let me know.
Hi I want to use glitter on the toes of converse plus put crystals on, how do I go about doing it? What’s the best glue for glitter? And do I just stick the crystals over the glitter? Will they stick? Or do crystals go on first and then put glue around them and then add glitter?
x
Hi Holly
I will test this afternoon the e6000 and gemtac, I have used the gemtac many times before for card making and it works very well, but not tried the e6000 before but will have a post up this afternoon about creating a heart with glitter and crystals. As regards the order, the glue would go on first, then the crystals and finally the glitter. Its the very fine glitter you want to use though which gives a much nicer effect and is almost powder like. Where e6000 is the stronger glue for the converse toe, it dries very quickly and is thick so we shall see how well it does with glitter.
Yes that was my worry as it’s a thick glue would it be ok to put glue around the stones and even it out with a brush then apply glitter do u think.? Thanks x
Hi Holly
Yes the e6000 works fine when its just applied but it dries fairly quickly so I would be inclined to use gemtac for the area your are going to use glitter on it stays tacky for a lot longer and will also give a good bond to the crystals.
Hi, is there anything else i can use other than rubbing alcohol, like nail varnish removed maybe? thanks
Hi Hannah
If you don’t have alcohol you can use Surgical Spirit, but make sure there is no Castor Oil within, if you cant get either just use a damp cotton cloth to remove any dust and give a good wipe and leave to dry. You can get Alcohol on ebay where I purchased ours from.
hi, I’m wanting to do my daughters converse, she is an infant size 6, can I use. ss12? I’d so roughly how many would i need? and also I have a pair of adults size 5, what size and how many crystals will I need for that? thanks.
Hi Danielle
ss12 are a good size for the smaller converse, it will take approximately 74 crystals per toe, you can also use the ss12 for adult size 5 or ss16 if you want to use less crystals. If you do use ss12 it will be much appreciated if you could let us know how many you use to update the chart.
hi
i need some BIG help i want to crystalise the whole of the high heel shoe but i dont want there to be caps between the crystals so what crystals do you suggest i use
kayleigh
Hi Kay We have a heel tutorial which shows you how to achieve this which you can find here http://www.crystalandglassbeads.com/blog/2012/how-to-crystallize-shoes.html Its using one main size crystal and filling in the gaps with smaller crystals.
Can you buy all this in one kit or does if have to be separately?
Hi Kerry You can buy it all from the one page aside from the alcohol, emery board/sandpaper and orange stick just choose the crystal size http://www.crystalandglassbeads.com/19-nhf-swarovski-rhinestones
Hi,
I am so confused. I want to ‘bling’ my girls converse for Christmas but keep reading different reviews on the best glue to use. Is the e6000 a better option over hot fix with regards to weather and general childs play. In other words is one glue likely to give over another?
Thanks in advance for any advise you can give
Teresa
Hi Teresa
I guess everyone will have their favourite adhesive which they like to work with. Gemtac is non-toxic and will give a good bond, it’s quite thin in consistency unless you leave the top off the tube for a few days to thicken and dries clear. E6000 on the other hand is an industrial strength glue so the bond will be stronger, it also dries clear but is a lot thicker and dries very quickly so you would only use enough for a few crystals at a time. With the e6000 you also have to put the top back on the tube after each squeeze or it will set in the tube, it has strong fumes which if you are using once or twice using by the window is fine, if you use on a daily basis you will need to invest in a mast to protect yourself from the fumes, but then the benefit is the strength of the glue its very strong. When it comes to hotfix these are not suitable for the Converse toe because the adhesive is designed to bond with porous materials like fabric or paper/card and for this reason they will give a good bond on the canvas part of the Converse but not the rubber toe. So to sum up you can use a combination of hotfix for the canvas and adhesive for the toe or just stick with gemtac or e6000 for the toe and if you want crystals on the canvas part of the trainer also use the same glue. For the Canvas part of the shoe the little star crystals look nice scattered sparingly over the sides. Hope this helps and if you need any other advise just let me know.
Hi,
Just wondering if I would be able to add crystals to an infant converse shoe size 1.
NyCole
Hi NyCole I would be very careful about adding crystals to a baby’s converse as baby’s tend to put the toe of their shoe in their mouth and chew on it. If it’s for a keepsake of the babys first shoe it will be fine but you will have to use small crystals such as ss9 or ss10 which are used for mobile phone covers. As regards the preparation if the toe is soft just give it a wipe over to remove any dust or grease and apply the crystals, if its not a rubber toe you wont have to rub the toe down as regards which glue would be strongest if its for canvas e6000 would be the strongest but its toxic so you need to make sure the toe doesn’t go in the baby’s mouth, the other alternative is gemtac which isn’t toxic and gives a fairly strong bond but not as good as e6000. Hope this helps.
Hi, I use E6000 adhesive to customise all of my Converse, however it doesn’t seem to bond very well to the Converse that have the black rubber toes caps only the white, it starts to lift as soon as it dries. I think I may need to trial and error some different glues as the E6000 doesn’t seem to bond to Havaianas or toddlers Hunter Wellington boots either.
Hi Kerry
The e6000 no longer works on Havaianas I have done a test with different adhesives and the one I found best was Gemtac, I haven’t tried converse with a black toe though sorry so am unable to advise which adhesive works well although I have been told by one of or customers that Evo-Stik serious glue works well so it may be worth giving it a try.
I orderd 2 x100 ss12 crystals to do my daughters infant size 5 converse, and have just run out using 109 crystals on one shoe, now i am short for the other and have to wait untill more come to finish the other shoe off, i went roughly by your chart u have 51 crystals per toe?i dont think that can be right?
Hi Lynsey
I haven’t crystallized size 5 shoes so the number of crystals we have on the chart are from customers feedback, so I would be very grateful if you could advise how may you end up using once the toes are complete, so that I can update the chart. Some people will add the crystals tightly as in the tutorial while others leave gaps and add glitter or gaps between the crystals, so the number of crystals they use will vary apologies.
Hi, I am in the process of customising my daughters converse and wondered if you have a tutorial on how to get the perfect heart or some tips?
Thanks
Sam
Hi Sam there are a number of ways to achieve this but a tutorial will be easier to follow so will try and get one up. You can either use a template or draw a heart free hand, if you drew a heart with permanent marker fill the the heart with a variety if crystal sizes or draw the heart in pencil cover the heart with glue (gemtac doesn’t dry as fast as e6000) add the crystals in a spaced out pattern leaving gaps between the crystals and then sprinkle very fine glitter over the remaining glue on the heart. The two hearts will look very different but will both give a nice result. Will try and get the tutorial up as soon as I can.
Thanks for this tutorial! I have just finished a pair of converse for my Husbands little girl for Christmas and they came out brilliantly!
Thanks for the feedback. Glad the tutorial helped and I bet she will love the sparkly converse for Christmas. You may find that a crystal or two may get knocked off over time, but if that happens just clean the area with alcohol and a cotton bud and re-apply some glue to the gap with a cocktail stick or onto the back of the crystals and then insert the crystal into place. I think my daughter has lost 2 crystals to date but they are easy to replace.
I am looking to add crystals to the outside tick on Nike Blazers size 5 any idea how many crystals i will need what size crystals to use,and where do i start, would it be on the outta edge first
Hi Sheila
Are you looking to cover the entire tick or just add crystals to the outer edge of the tick and is it possible to send a picture of the tick profile if you have one to info at Crystalandglassbeads.com and then I can do a mockup for you, or if you look at our facebook page we already have a mockup of the tick with crystals on there.
Im so grateful for this tutorial! I crystallised some converse for my step daughter for Christmas and she loves them! I’ve now got about ten people asking me to do them so I have to say a massive thank you!!! Xx
Hi Nena
Thanks for the feedback its much appreciated, I’m glad it helped and that your step daughter liked the sparkly converse, we will be having a Nike Blazers tutorial coming soon so hopefully that will help to gain you some more customers.
Hi, I want to add some sparkle to a whole tick on nike blazers. Would I be best using e6000 glue? I tried gem tac before and wasn’t a massive fan
Also what size of crystals am I best using?
Thank you
Hi Emma
I will be doing a Nike Blazers Tutorial in the Next few days which will show a step by step tutorial for crystallizing the tick. E6000 would be the best adhesive and im guessing at the moment ss12-ss16 for the tick with filler crystals for smaller gaps.
That’s brilliant I’ll hold off doing them till your tutorials done 🙂
Thank you
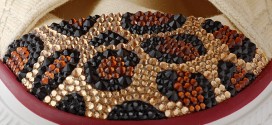
I’ve seen a lovely pair of customised converse on eBay with a leopard print design on the toe in 3 different colours (black & two tan/ orange colour)
Do you have a tutorial on how to do this? Or where I can get the right coloured stones?
Hi Leanne
It would take a range of crystal sized to fill in over the different colour patterns of the shoe possible using jet black, and two of the various shades of topaz. If the patterns are quite big then you may be able to get away with using three different size crystals, where in they come out into fine points you may need to use a larger range of smaller crystals to cover the print and keep the design accurate.
Can u post how many crystals I need for a toddler size 4.
Hi Cindy it would be approximately 45-50 ss12 crystals per toe, I would be grateful if you could let us know the exact amount you use when completed, so that I can update the chart for size 4 toddlers.
Has any one try putting crsyals on point shoe,s i would love to here from any one.
Hi Gillian
I haven’t tried crystallizing point shoes, but it would be the same principle as the shoe tutorial http://www.crystalandglassbeads.com/blog/2012/swarovski-crystal-shoes-tutorial.html you can either use non-hotfix with a suitable adhesive or hotfix which I would probably opt for as the material is satin for Pointe shoes. We have a tutorial here for applying hotfix crystals http://www.crystalandglassbeads.com/blog/2012/how-to-apply-hotfix-crystals.html with the hotfix crystals you just put the correct size tip on the applicator wand, turn on the wand to heat up the tip and pick up a crystal in the tip. Watch the end of the crystal and you will see the glue change colour slightly as it starts to liquefy then press the crystal onto the shoe, that way you reduce the risk of marking the material with the heated tip.
Hiya,
I clicked through to the swarovski link to buy the bits & pieces needed - are the crystals with foil backing suitable for this, or is another specific type of backing required?
Regards,
Louise
Hi Louise it would be the foil backed crystals yes, the backing acts like a mirror reflecting the light back through the crystal to make it sparklier along with providing a good surface for bonding.
Hiya I’ve been trying to crytalise a few things but when the crystals dry they seem extremely dull ..almost as if the (flat back side) has shrivled up 🙁
Do you think it’s because these are normal rhinestones and not Swarovski? I use e6000 glue x
Hi Brooke I think the problem you are having is because the crystals are acrylic and the e6000 melts them along with their foil backing, you either have a choice of using a different adhesive like gemtac or using a higher quality crystal like Swarovski or Preciosa.
Hi i want to apply gems to mine and my daughters converse but i cant afford Swarovski’s can u use cheaper gems off ebay? Resin ones or acrylic (not sure if they are the same ) if so wot glue do u use for them thank you 🙂 and any think i should defo not use/buy
Hi Carlie With Swarovski crystals which are glass with a metal foil backing e6000 is fine but cheaper crystals are often acrylic with a plastic metail foil looking back which gets eaten up by e6000 and makes the crystals cloudy. So if you are going to use acrylic crystals I would suggest gemtac as an alternative adhesive which is still very strong but wont destroy the crystals.
Hi, the chart has 2 different numbers for how many ss16 crystals I would need to bling up a pair of women’s size 5 converse, do you know the correct amount for each toe? X
Hi Lauryn The figures are provided as feedback from customers so I would guess it would be the figure with more crystals as some people may leave gaps while others will have quite a tight design of crystals. I would be grateful if you could give your feedback once you complete the converse so that I can take the average of the 3 figures then.
Over the last few months I’ve used this tutorial to make several pairs of crystal chucks. I have some tally’s for women’s size 9 but I need to find them first. I just wanted to reply to the person who commented about the e6000 not sticking on the black toe converse. I just did a pair of those and the trick was to get 60 grit sandpaper and really go at it. I sanded hard for awhile to get it rough enough. My chemical engineer husband thinks they have carbon black in them which is really slippery. So far my crystals are sticking fine with the e6000. Your site has been really helpful, I greatly appreciate it.
Hi Alana Glad you found the tutorials useful and thanks for the advise about the black toe converse.
Would just like to say thank you for the tutorial on how to bling a pair of converse. My daughter is 15 on Thursday and has wanted a pair of Swarovski crystal converse since Christmas but could I get a pair of size 3 anywhere. Then I came across your website it was amazing form the tutorial to what I need to order …..I placed my order last week and it came the next day. I’ve sat down this morning and just made my 1st pair and I’m rather impressed with myself and the outcome. Would just like to say thank you and I will be placing a new order very soon.
Hi Maddie Im glad the tutorial helped, will be a nice surprise when your daughter gets them for her birthday : )
Hi there I am new to this my daughter asked me to make princess crowns with her converses and I can font a tutorial no where just the pic she showed me any tips plz…x
Hi Claire as soon as I get a chance will put together a tutorial for creating a princess crown.
Hi I’m going to order the swarovski flatbacks but wasn’t sure if I should get the crystal or crystal ab. Which one is used in this tutorial?
Hi Mari It’s the clear crystal that’s used in the tutorial if you look at our page for Non Hotfix Flatbacks at the top of the page the single crystal is a clear one and the crystals shown for the various round crystal sizes lower down the page are the Crystal AB which have a rainbow effect with lots of purples, pinks and silver.
Hi there,
I am looking to add Swarovski Crystal’s to the toes of a pair of Size 5 Black Converse. Would you be able to advise me on what size crystals to use, I am torn between ss12, ss14 or ss16. Is it better to use one size crystal all over or to have a bit of variety? Also, what glue would you recommend for being durable and waterproof? Do you sell application kits too, such as the Jewel Setter? And finally, do you sell black Swarovski Crystals?
Sorry for all the questions! I’d be extremely grateful for any advice or tips you may have.
Thanks in advance,
Kim
Hi Kim you can find everything you need on the crystal pages just select the size you require. non hotfix flatbacks If they are adult size 5 I would opt for ss16 and a small amount of ss12 for any gaps at the ends of each row. If you want an extra few rows of crystals use the ss12 and ss9 for any gaps, but with smaller crystals they are just as easy to use but you need to be a little more careful of the adhesive and getting the crystals buried under the glue. As regards adhesive I would opt for e6000 as it will give the best bond.
Hi there, is the anything else i can use for the rubbing alcohol? Could i use surgical spirit? X
Hi Lauryn If you cant get rubbing alcohol you can use surgical spirit just make sure its one without castor oil. I wasn’t able to get any in our local chemist either so ordered off ebay where there are plenty of suppliers.
Just wanted to thank you for your fabulous tutorial. I followed it to the letter and have crystallised my daughter’s silver hi-top Converse as a surprise for her, and they look great. You have not only saved me money, as I had planned to pay someone to do it for me, but also given me the satisfaction of having created something really special for my daughter myself. I am completely un-artistic and so if I can do it, anyone can! I have also added pink satin ribbon to the boots (replacing the laces) which finishes them off nicely.
Hi Victoria
Glad you found the tutorial easy to follow, the feedback is much appreciated if your daughter is anything like mine she will love the surprise, never thought of replacing the laces its a good idea : )
Hi Khaled Thank you so much for all your help and advice ,have just crystallised a pair of Blazers for my Granddaughter and they look lovely I followed your tutorial and it worked a treat I changed laces for ribbon and my Granddaughter is thrilled with them I am now waiting for summer sandels to be brought to add crystals to them also brilliant postal service I live in Kent ordered crystals late Friday afternoon and arrived in post Saturday morning Well Done Many Thanks Again
Hi Sheila Glad they arrived safely.
Hi, I am just part way through customising my converse and I’m wondering if the e6000 glue is just as good with sticking my Swarovski crystals to the canvas. I’m planning on going down the back tab, at the heel, once I’ve finished with my toe part. Your help will be much appreciated 🙂
Hi Nicola
The E6000 will give a good bond once the glue has gotten a good bite into the fabric, which means that you will have to hold the crystal in place for a good few seconds of the crystals just tend to fall straight back off otherwise have a look at the shoe tutorial its the same technique of adding the crystals holding them in place and clearing away any surplus adhesive.
hi,im glad i found your tutorial it was a great help.Ive had to do a pair each for my 3 daughters and that love them,could i just ask how do i get the excess glue off once its all dried? thanks Lisa
Hi Lisa
You can remove excess glue with a cotton bud and nail varnish remover, just wipe over the crystals and it will remove any from their surface just be careful that the cotton buds aren’t too saturated with liquid so that it doesnt runn all over the other crystals.
how many crystals for size nine
Hi Shaena do you mean adult or child size 9?
Hello,
Iv recently purchased a pair of adult size 5 Converse for my wedding day and i wanting to crystallize the toes, what size crystals would you recommend and how many? What size E6000 glue will i need and am i best buying the glue applicator syringe too?
Thanks 😀
Hi Chelsea
You will need about 150/160 ss16 crystals per toe which is the most popular size, the smallest e6000 will be enough for a pair of converse, you won’t need a syringe but a jewel setter will make picking up the crystals easier.
Hi how many crystals would I need for a toddlers size 5 and what size crystals would your recommend?
Also would like to do mine too: a size 6 adult females shoe?
Thanks
Hi Laura
It will take approximately 50 ss12 crystals per toe for the childs size 5 and 150/170 ss16 crystals per toe for the size 6 Converse toe. If you can measure the width and radius of the child size 5 (size from toe tip to laces of the rubber toe) I can do a quick mock up with smaller sizes to see how it will look.
I have just brought some converse so I can make my own pair of these crystal shoes. Do you definitely have to score them before sticking the crystals on because I know someone who’s made them and they said they didn’t score them and none fell off?
Hi Sophie
You dont have to score them, but each process is just a step to help ensure that the crystals stay in place for as long as possible. 1. scratching the surface. 2. removing any grease 3. using the strongest adhesive you can.
Hi I’ve followed your tutorial and got my little girl a gorgeous pair of blingy converse. Do I need to top coat the crystals with anything once I’ve finished?
Hi Rebecca
Glad you found the tutorial useful, no you won’t need to coat the crystals but you may find you loose on or two crystals eventually. If that happens just clean up the area with some alcohol so that there is no dirt, use a tooth pick to dab a bit of glue into the gap and add the crystal and it will be as good as new. I think while the converse fit her we lost 3 crystals in total.
Hi
Thanks for all the great tips, I was wondering how to put names and patterns in rhinestone on to converse?
Hi Paula Will try and get a tutorial together to show how to do this.
Hi There! What a great idea!!!And soo easy to follow!!! Im goin 2 buy a pair each for my daughters! Kids size 11 and size 1 please could you tell me what size crystals are best? Roughly how many i would need per pair and the best place to purchase these kits from??? Many Thanks Sara X
Hi Sarah
You can purchase everything you need here in our Non-Hotifx Flatback crystals page, just select the size you require and the glue and tools are on each page. The ss16 are the most popular size and then a few ss12 just to fill any gaps. You will need approximately 400 ss16 crystals and a small pack of ss12 crystals just to fill in gaps.
Hi, looking at customising a pair of size 6 adults and a child’s size 13. I was just wondering how many crystals I would need in total and what’s the best place to buy.
Many Thanks Zoe
Hi Zoe It very much depends on how tight the crystal design is placed as to the exact number of crystals you will need but it will be approximately 500 x ss16 crystals and just a few ss12 crystals to fill any end of row gaps.
We supply everything you will need, you can view our non-hotfix flatbacks here.
Hi, I’m customising my daughters size four as I bought her a pair already done and every gem has fallen off, Does the E6000 cloud the foil backed crystals as I’m sure I’ve read this on other posts? Would you recommend this or gemtac?
I’m going to use ss16 (4mm) as these are what are already on there will 100 be enough.
Thanks!
Hi Lyndsey
The answer is yes and no to the crystals being clouded. If you are using acrylic crystals then the backing which looks like metal but is actually a plastic foil starts to dissolve along with the clear acrylic part of the crystal which then turns cloudy. So if you are using acrylic crystals gemtac if your safer option, if the crystals are Swarovski e6000 works well as the backing is a foil and the crystals are glass crystal so they don’t dissolve. It will take approximately 110 crystals per toe for the ss16 so you will need 220 x ss16 crystals for a pair.
Hi I am wanting to add crystals to my converse but was wondering what size crystals and how many approx I would need. It’s for a adult size 7. Thanks
Hi Eleanor ss16 would be the best size and it would take approximately 150/160 crystals per toe.
Hiya, I’m excited about trying my hand at customising a pair of converse for my daughter. Just wondering what size crystals would you recommend for infant size 2, infant size 3 and infant size 4. Also how many crystals would ya need for each pair?
Many thanks 🙂
Hi Shell ss12 are a nice size crystal to use, you can go down to ss9 if you want more crystals on the toe but I wouldn’t go any smaller as they are a lot more difficult to apply as the crystals become smaller as they get bogged under the glue if its applied too thickly. As regards how many ss12 crystals it would be somewhere between 40 and 50 crystals per toe.
Hiya, how much glue should I use? Would it be a tube of glue for each pair of converse? Was thinking of using the E-6000 glue. The converse would be infant sizes.
Many Thanks 🙂
Hi Shell the o.5 oz glue is plenty for a pair or 2 of converse if they are quite small sizes, if you are looking at doing more a 1.0 oz tube, im not a big fan of the very large tube as it tends to dry in the nozzle too quickly.
Hi thanks for the tips for doing this… I was wondering would you be able to point in the right direction as to where is the best place to buy all the little extras that can be added to the converse, I’ve seen for example hello kitty things glued to the rubber of the converse?? Thanks again…
Hi Simon Do you mean create a design of the Hello Kitty face in crystals or find a plastic Hello Kitty head and stick it on the shoe?
Hi
For toddler size 2 - 5 converse what size crystals should be used? how many crystals? Would one tube of E-6000 glue do one pair?
Thanks
Hi Gary ss12 which are 2.3mm crystal are a good size it will take between 40 and 50 crystals per toe.
Can I use Gemtac glue instead of E6000 when crystallising converse?
Hi Billie
Yes quite a number of our customers use Gemtac because of the fumes with e6000 its not an industrial strength glue but the bond is still strong.
Hi. I’m hoping to make my nieces customised one direction converse. They wear an adult size 4 and 5. What size of crystals would be best and how many will I require. One toe will have clear crystals with the letter I and a heart in red and the other toe a number one and letter d. Thanks.
Hi Danielle
If you can wait until the weekend Will put up a tutorial for a crystal heart on converse 🙂
hi there im wanting 2 do my daughters converse in the crystals where is the best place 2 buy the crystals thanks ..
Hi Lynsey
You can find everything you need including the glue, jewel setter and crystals, just select the size you require. Its usually the ss16 or ss12 for the Converse Non Hotfix Flatback crystals
Hi I am stoning a size 7 and size 10.. I was told to use ss 20 I am stoning the front the sides and the middle back. Do you suggest to different size stones?
Hi Mrs Hines
You can use ss20 which are 5mm, it just means the toe takes less crystals, if it’s for child Converse I would opt for the ss12 as the more crystals the greater the sparkle effect, and for adults ss16 (4mm).
Hi just about to order myself some gems but unsure which colour to get. I’m looking at getting ss16 ss12 and ss9 2 packs of each but am unsure as there seems to be 2 different clear colours. Which ones are you using in your tutorial?
Hi Sam its the clear that’s used in the tutorial the other clear colours are either the crystal AB which has a rainbow effect (a lot of pinks, purple, silver and yellow) or Moonlight which is a kind of vintage crystal colour with a light rainbow effect. Hope that helps.
Hi thanks for your reply iv ordered a few packs of the clear ones now thank you.
Hi do you sell the set so i can get started on my converses? i have size 6 adult. wanting clear crystals - please email me !
Hi Rachael You can get everything you need here http://www.crystalandglassbeads.com/19-nhf-swarovski-rhinestones Just choose the size you require.
How many per toe with SS16 for Toddler Size 8?
Hi Shelley from the customer feedback we have had its approximately 81 x ss16 and 3 x ss12 or you can just space the crystals out slightly so that you don’t need to fill any gaps at the end.
Hey, just wondering for a baby’s size Converse what size crystals I would use?
Hi Donna
If its the leather toe baby converse I wouldn’t recommend using crystals as no adhesive gives a really strong bond on leather, but if you intend to do just for a keepsake then ss9 are used for gadgets which will be a good size, if you look at our latest post you can see an example of the smaller crystal sizes on a tiny gadget which will give you an idea of ss9 size.
Thank you for your fab tutorial. I have just finished my daughters and they look amazing. Have just ordered another 3 packets of crystals to do my own! I posted a picture on my facebook account and have had loads of comments asking how I did it so I have posted a link to your website. Hope this is ok?
Thanks again
Laura
Hi Laura Glad you found the tutorial useful and the link is much appreciated, I should have another converse tutorial up soon with one toe having a tiara on and the other a heart in crystals.
So excited to have found this! Have ordered all the stuff and am going to try this on my daughters converse.
Quick question though!
Shes already worn them a few times will they still be okay or should i use brand new ones?
Hi Amy they will be fine if she has worn them, but I recommend cleaning the toe first with rubbing alcohol (to clean any dirt or grease away) which you can find on ebay as we don’t sell it.
Hello can you use hotfix crystals on converse? But glue them instead of heating them up?
Hi Kirsty
You can use them but they are more expensive than non-hotfix and as long as the glue bonds to the hotfix glue backing they will stick. The downside is that the foil backing is bonded to the hotfix glue with a primer which may become the weak point as im not sure how strong the primer bond is, whether its just there to hold the backing in place until the glue melts or whether the bond is as strong as the foil backing/crystal bond.
hi! I am really interested about doing this to my converses! how many crystals would be needed for a pair of adult size 6 shoes?
Hi Kaysie It would be about 150/160 size ss16 crystals per toe you can see the ss16 crystal colours here Swarovski have a good range of colours, but the most popular by far is the clear crystal.
Hi, looking to decorate a pair of pink all star converse like this, how many crystals will I need for UK Adults size 7 converse all stars and what size would I need? Do you recommend anywhere to get the kit? ( the list of things you mention on the list of what you need ). This would be a great help thanks, never done this before.
Hi Aimee
You can get everything you need from our flatback crystals page just chose the size you requite, the only things we dont stock are the orange stick and rubbing alcohol which I get ours from ebay. The ss16 are usually used for adult converse and for a size 7 it would be approximately 160 x ss17 per toe.
Just a quick question. When I’m putting the glue on I’m getting a small overspill onto the crystals and the edge of the converse. I take it this means I’m using to much glue? And is there anyway I can clean this off?
Hi Amy yes it means you need to spread the glue out a little more or use less glue, you can remove from crystals either with a scalpel or using a cotton bud with acetone/nail varnish remover. Dip the cotton bud in the nail varnish remover REMOVE THE EXCESS then gently wipe the surface of the crystal and it will remove any glue over the crystals. If there is too much nail varnish remover on the bud and it runs over the glue holding the crystals then it will dissolve the glue and the crystals will come loose so you just need to be careful.
Hey,
Did anyone make these for the baby size? I really want to try but not sure whether it will work due to a comment further up.
Thanks.
Hi Alex The glue will bond but the strength of the bond wont be as strong as it would be on a more rigid surface like the adult converse, where the e6000 bonds well on the toe and the hotfix on the canvas part of the converse or non hotfix with e6000 / gemtac. With baby converse there is the worry of the crystals coming loose and if its a leather/ similar material on the toe there is no adhesive that gives a really satisfactory long term bond.
hi i want shoes with diamonds too can i buy some shoes with diamonds from you please let me know!!!!!!!!
Hi Daria
We supply the crystals and have tutorials but don’t crystallize for customers unfortunately as I just don’t get the time, I can put you in touch with some customers of ours that crystallize shoes If you would like.
Hi, fabulous tutorial! Was wondering about hotfix, I read your reply to Kirsty but am still a little unsure; could I use hotfix as they were intended to achieve this effect, I.e. with the wand to heat them on to the toe, rather than using glue? thanks x
Hi Natalie
You can use hotfix crystals for the canvas part of Converse but not for the rubber as the hotfix glue isn’t intended to bond with rubber, only paper, card and textiles.
Hi. First of all thanks for your brilliant tutorials as i have now customised loads using your techniques and tips. I have now ‘progressed’ and I want to customise my daughters converse with crystals but wanted to add a little crown or heart to them. When will you be posting a tutorial on this? Also! A friend has asked me to put crystals on a size 3 converse pram shoe and wanted the soles done too as they are a keep sake. What size crystals would I use for this and how many would it need? Would I still use gemtac and no hot fix for this because the bottoms are material.
Many thanks
Yvonne
Hi Yvonne
I have finished the Tiara and Heart tutorials which you can find on our facebook page http://www.facebook.com/crystalandglassbeads Will also put up a post on our blog soon. As regards a size 3 shoe I would probably use ss9 crystals which are used for gadgets, you can use gemtac but I would stress that the shoes are for keepsake only as if the baby chews on the crystals they will come loose eventually which can cause a problem for the baby choking. If its material you can also use hotfix crystals where no glue will be required.
I just came across your tutorial and could not be happier! Fabulous tutorials! I would like to crystallize my size 4 uk Converse, how many size ss16 crystals do you recommend per toe and as you say in this tutorial do you recommend having a few ss12 crystals to hand as well? Thank you!
Hi Sarah
A size 4 will take approximately 110 ss16 crystals per toe and you may find that you will need 1 or 2 ss12 crystals to fill in any gaps, which will very much depend on how you apply the crystals and the spacing left between crystals and rows.
Hi.which is the best to use, clear or clear ab , also how many will I need for a size 3 toddler and size 7 infant ..thanks 🙂
Hi Kelly clear are more popular than AB but it will very much depend on if you want a subtle sparkle with the clear crystals (like diamonds) or something a bit more with the crystal AB. I havent crystallized shoes that small sorry so I cant give you an amount but it wont be very many at all compared with a larger child’s or adult converse.
Hi, what is the difference between crystal ab ss12 and just crystal ss12? Thanks
Hi Gemma
Have a look at http://www.crystalandglassbeads.com/19-nhf-swarovski-rhinestones The single crystal at the top of the page is clear crystal, the ss3 to ss48further down the page is crystal AB which has a rainbow effect on the crystals so that they are multi colour.
would just like to say a huge thank you for this tutorial. Just done my own converse and used gold rhinestones and gold studs (on maroon converse) they look amazing!! The tutorial is so easy to follow too!
Hi Jess glad you found it useful, the colour combination sounds great and the crystals should stand out nicely.
Hi khaled
I am doing a pair of adult size 6 converse crystallising the toe what size crystal would you recommend (using clear) and roughly how many will I need?
Many thanks
Rachel
Hi Rachael I would recommend the clear ss16 crystals and you will need approximately 150/160 crystals per toe.
Hi Team, please can you advise which colours you would recommend for leopard print crystal toes, I know I need jet for the spot outlines but an you advise what you , or your page followers can advise , what are the best colours for the brown colours of the print needed? Golden shadow & smoked topaz, not sure what works best so any assistance ispreciated. Thanks
Hi For leopard print I would have a look at light colorado topaz, topaz and either Jet or Mocca (dark brown) we have just got the colours in for creating a leopard print and have them is ss5, ss7 and ss9 + larger sizes.
Hi Team, has anyone got figures to know how many crystals it takes to crystallise adults size 6 & size 7 adults converse with SS16’s?
Also kids size 5? What soze crystals would you recommend ss12’s or smaller?
Many thanks
Hi It should take around 140/160 crystals per toe for ss16, for a kids size 5 you can use ss12, ss10 or ss9 it really depends on how many crystals you want to get on the toe and how easy you want to make the job for yourself. Its more cost effective to use ss12 crystals which are a nice size and quick to apply. The last 2 tutorials I have put up are for a child size 8 and use ss12 crystals for the main size which you can see here http://www.crystalandglassbeads.com/blog/2013/how-to-create-a-swarovski-crystal-tiara-converse-tutorial.html
Hi, Please can you kindly advise if you will be publishing a tutorial on the leopard print converse pattern at all ? Or could I request that this be added as part of your development of your brilliant tutorials ?
Many thanks
Hi I have a few tutorials planned once I have finished updating the site and then I will put up a tutorial for leopard print.
Hi Khaled, Awesome tutorial. I can’t wait to try this and was just wondering, I would like to do a pair with Mickey & Minnie mouse silhouette heads on the front. For an adult size 8 (I know I am a big kid :o)) would you recommend using the SS9 all over the toe so I can get the shapes right? (Like on Minnies bow) If so how many would I need? Thanks in advance :o)
Hi Chloe
If you can measure the width and length of the toe and let me know I can make up a mock template ; )
hi can i use acetone instead of alcohol wipes to clean the surface?? many thanks..
Hi Kendal
Acetone can be used as a degreasing agent but some nail varnish removers contain oil, colour or perfume which may leave a greasy residue so check the ingredients first. If you do use make sure that its all evaporated before adding any glue or crystals or the acetone will eat the glue before it sets.
Hi Khaled, Sorry I didn’t see your reply! The toe is 7.5cm at its widest at the top and the length is a smidg over 4 cm. Thanks so much :o)
Hi Chloe
Sorry for the delay do you mean just the head and ears for mickey and head ears and bow for minnie?
How many crystals for a preschool size 2?…what size crystal should I use?
Hi Dana Can you measure the width and length of the rubber toe and I will do a mockup of which crystals look the best.
Hi Khaled,
Yes please, take a look at this link (If it works!)
pinterest.com/pin/108790147221235942
Thanks 🙂
Hi Chloe
Have the template and will email over to you, was hoping to get a tutorial up to show how to do it, but haven’t had time yet.
Hello. I was wondering what size and how many crystals I would need to crystallize a US size 9 and a US size 10 pair of converse.
Hi Emma
Approximately 150/160 ss16 crystals per toe for an adults size 9 / 10 which is a UK 6.5 /7.5.
Hi I was wondering what size and how many crystals you’d recommend for a uk adult size 7. I want them to look really crystally if that makes sense!
Thanks 🙂
Hi April ss16 which are 4mm would be the best size and it will take approximately 150 to 160 crystals per toe.
Great, Many thanks. Can’t wait to see it & get started :o)
Hi Chloe
Re sent the template, not too sure who I set it too in the first place, but i get it wont make much sense to them : )
Hello,
How many and what size crystals do you recommend for toddler sized Converse? Size 3.
Hi Lynn
I should be doing a pair of baby converse in the next few days along with testing to see which is the strongest adhesive for the material.
I was wondering how many you would need for a infant size 6 (1-3.5yr)? Love this tutorial! Thanx! 🙂
Hi Emilia
ss12 are 3.2mm and a nice size to use you will need from customer feedback approximately 75 crystals per toe or if you prefer to use ss16 which are the 4mm approximately 65 crystals per toe.
Hi, was wondering if you have done the baby converse yet?? x x
Apologies for the delay have had a number of problems of the main site which have taken weeks to fix but back to creating tutorials so they should be done soon.
Hi
What is the best way to do initials on converse plse
Hi Carol
It would be to write the name out in pencil first on the canvas material then crystallize, I haven’t done a tutorial yet but will at some point.
Hi
I am often left with a lot of glue on my rhinestones and find it impossible to get off. What is the best way?
Also do you recommend putting a varnish over the top to set them even more?
Thank you
Hi Mel
The problem with getting adhesive on the crystal usually occurs from one of two reasons, either the adhesive is applied too thickly and when you press the crystal down it sinks under the surface. Or secondly the crystal is pushed down into the adhesive and then positioned where the sized of the crystal scoop up all the glue as its being pushed, its best to position and then push down so you wont get this problem. putting a varnish over the crystals will reduce their shine that’s the only problem with using a top coat for converse toes.
Hello it was also baby ones I wanted o try but they dont have the hard bit at the front - are you thinking the glue needs to be changed then??
I have a pair of toddler converse and will be doing a tutorial.
Where can I buy the glue gems and tools from please?
Hi leila
if you are in the UK or EU you can get the glue, gems and tools here http://www.crystalandglassbeads.com/8-swarovski-crystals
How many crystals would I need for the bottom of a pair of newborn crib shoes.
Will be doing a pair of crib converse soon and post the tutorial.
hi where do you recommend buying the crystals from?
Hi Anna
You can look at our prices and see if you are happy http://www.crystalandglassbeads.com/8-swarovski-crystals
I just did a pair of size 4 toddler converse. I used ss16/4mm and it took 64 per foot.
Hi Rachel
Many thanks have updated the chart.
Hi I was just wondering which glue is best for the material part of the converse? Thank you 😀
Hi Abi
Hotfix would probably give the longest lasting bond as its designed for use on fabric, but e6000 or gemtac can both be used.
How many crystals and what size is recommended for a toddler size 9? Where do you recommend getting the Swarovski crystals?
Hi Christina
I have a pair of toddlers converse to crystallize so will be doing a tutorial soon and have an idea as to the number of crystals and how many each size will require.
I just customised a uk size 7 pair or converse with ss16 clear Swarovski and used 214 per toe. I had no spaces and used 4 ss12 crystals to fill in the odd spaces. They are so sparkly they are almost blinding! I am sooo impressed with my first attempt. Just have to wait for them to dry. Thanks for your tips x
Hi im going to do this for.my niece size 10 children converse what size crystals shall I use and anyone recommend where I can get the crystals
Hi Claire
Think I have just replied as to where you can get the crystals but as regards quantity and size You can use ss16 which will take approximately 90 crystals per toe or you can use ss12 if you would like more crystals to be on the toe.
Anyone recommend wherr to get the crystals from?
Hi Claire
You can view our prices here http://www.crystalandglassbeads.com/19-nhf-swarovski-rhinestones
hiya was wondering if you could give me advise on what size crystals for size 3 womens converse and how many and what glue to use / many kind regards
Hi Kirstie
ss16 is a nice size and from the feedback from customers approximately 105 to 110 ss16 crystals per toe. Would be grateful if you could give me a figure once you complete your size 3.
Hi Sarah
We have had a number of customers who have crystallized the old fashioned chrome microphones the process is the same as the iphone case tutorial http://www.crystalandglassbeads.com/blog/2012/how-to-make-swarovski-iphone-case-tutorial.html
Any suggestions on how to cover up the red / blue line around the edge of the soles of converse trainers. Red or blue don’t go with my colour scheme and can’t find any converse that don’t have the lines on the soles. Thanks and great website!
Hi Ruth
You have 2 options to colour the strips with rubber paint which if you use a cheap one that’s not UV stable it will crack and peel and discolour, option 2 is to cover the strips with crystals, pearls, or something small and stick them over the strips with a suitable adhesive.
Gemtac is no where near as good as E600 glue, please if you are putting Swarovskis onto your converse or blazers etc then I would definitely recommend E600 instead and use the guides above following the suggested rows, however only put enough glue onto the toe to do 2 or 3 crystals at a time (working in rows) as the glue dries fast and you don’t want hard glue on the toes before you have put the crystals on!
Hi Danielle
Thank you for the comment. I haven’t tried gemtac on Converse but I know a number of our customers prefer it over e6000 for converse mainly because they don’t like working with the fumes. I tend to use a mask which eliminated the fume problem but I do find that the glue dries very quickly and a few crystals at a time ensures that the crystals get a good bond with the glue before the surface hardens.
Hi
I’m wanting to cover the toes and back panel of a uk size 5 converse which size an quantity would you recommend to make it really bling?
Thank you
Hi Emma
If you measure the back strip width and length I will be able to give you an idea of quantity as regards size ss12 or ss16 would be a good size.
Hi
Can you give instructions on how I can get the perfect “mrs clarke” on the side?
Is it best to write it in pencil first?
Hi Leyla
Yes it’s best to write in pencil first I would have a look at fonts online and practise writing the Mrs Clarke to scale to make sure the writing is to scale for the side of the shoe, I will do a tutorial for writing a name but wont get a chance for the next week or 2.
Perfect my girls surprise trip to disney next month. Is there a printable template of the crown?
Hi Joan
There isn’t a printable template because its just three rows of crystals, if you watch the video at the bottom of the post it also shows a number of alternative patterns, you just need to work out your stating point and try and put the crystals in a straight line, which is why a pencil mark comes in handy.
Hi. What size e6000 glue would you recommend I get If I am just crystalising one pair of converse please? X
Hi Danielle
The 0.5oz will be enough for a pair of converse.
Hi, I want to custom 2 pairs of converse for my daughters can you advise what size crystals I will need?
Uk infant size 6
Uk size 11
Thank you in advance
Hi Danielle
For a child’s size 11 you can use ss16 or ss12 it will take approximately 90/100 ss16 crystals PER toe and for the size 6 ss12 is a better size and will take approximately 70/80 crystals PER Toe.
Hi. What size of Swarovski flat back rhinestones will I need for a uk size 6?
Hi Kaitlyn if its an adults size 6 then ss16 would be a good size for childrens an ss12 would work well.
Hi I would like to crystallise toddlers converse size 6 in red crystals.
What crystals would you recommend and how many I will need?
many thanks
Hi Rasa I don’t know the exact number as I haven’t done a toddler size 6 yet, but you can use ss12 light siam crystals which are 3.2mm and a pillar box red colour which is nice and bright. As regards the quantity from feedback I would say for a toddler size 6 a pack of 100 crystals should be enough for the toe’s. If you let me know the exact figure once complete I will update the chart.
Which is the best glue to use? Is it ok to use the glue sticks that come with glue guns off ebay/amazon?
Hi Rebekah
Glue guns aren’t suitable for attaching crystals with unfortunately as they just end up making a mess.You can either use non hotfix crystals and a suitable adhesive or hotfix crystals with an applicator tool which heats up the crystal melting the glue on the back (be aware that hotfix crystals are only suitable for using with fabrics or paper/card).
What website do you order the crystals from xx
Hi Nicole
We stock everything you need which you can find here http://www.crystalandglassbeads.com/19-nhf-swarovski-rhinestones including tools and adhesive.
Hi i was wondering what typr would i buy for a size 5 girls and a toddler size 8. the chart above is all the types you would need or do you choose one size to purchase?
Thanks for your help this is my first time.
Hi Lori
You can use ss12 (3.2mm) for both converse which is a nice size and easy to work with.
I need to complete adult size 7 & 4 also a child’s size 6. What size crystals would be best for these? Thanks x x
Hi Liz For the adults size ss16 which are 4mm diameter and for the child’s converse size ss12 which is 3.2mm (you can then use a few of the ss12 left over from the size 6 for filling in any odd gaps for the adult size converse).
Hi,
Looking to do size 3 adults, how much glue will I need? Thanks, Emily x
Hi Emily the 0.5 oz e600 tube will be plenty, if you are opting for gemtac, then the standard size bottle will last for months.
I am wanting to do the fabric part of the shoe instead of the rubber toe. Is there any surface prep required for that, or can I just start gluing the crystals on?
Hi Lisa
If they are a new pair of shoes just make sure they are clean and dust/fluff free, if you intend to crystallize the whole of the canvas part of the shoe it may be worth considering hotfix crystals as they don’t require any adhesive and the bond is very strong.
Thanks for your help showing us how to make this,
I wanted to know if u know where the best place to buy the rhinestones.
I need to make 4 pairs for my daughter and 3 nieces.
(Size 8 toddler, (2) size 2 baby, and size 13 kids) I don’t want to spend that much because they are young kids and it will get messed up quick lol”
Hi Emily you can get order crystals here
How many rhinestones of ss16 would u need for size 10 kids
Hi Kerry
You will need approximately 90 ss16 crystals per toe for a size 10 childrens converse.
Just did my size 4 (adult) converse. Ordered 250 ss16 crystals as this should be more than enough for both toes according to the guide. Am about to run out about 75% of the way through which is very frustrating! Even assuming my crystals are tightly packed (they aren’t particularly) its quite a way off.
Hi Rachel
The figures on the chart are from customer feedback as I have only Crystallized smaller converse sizes, if you are able to provide your total per toe once you complete the size 4 I will update the chart to reflect the number used.
hi is there any special stencils i can buy to write names in chrystals plz ?
Hi Natalie
Most people write names by hand am in the process of completing a post showing how to crystallize makes, can I ask what the name will be going on just so that Make sure that I Cover it in the post.
Hello, im planning on putting swarovski crystals on a size 4.5 converse, roughly how much crystals do you think i will need per shoe?
Hi Makeda
The Chart is based on blog readers/customers feedback but some of the results can be a bit lower as the crystals haven’t been placed tightly together, so I would say approximately 170 crystals per toe. If you are able to give us some feedback and an accurate figure once you complete your converse I will update the chart to reflect your results.
I was wondering if I waterproof my converse’s. Can I waterproof the stones also?
Hi Stephanie
By Waterproofing the converse do you mean spray them with a water resistant protector? If this is what you mean it helps to keep light rain from soaking the canvas as regards the crystals and glue as long as you have used an adhesive like e6000 or gemtac the glue is waterproof and the crystal will also be water proof as they will be made of crystal glass is they are Swarovski or acrylic if they are Chinese or Korean crystals.
hi there the names would be brooke and summer thank you
Hi Natalie
I have started the tutorial will show how to crystallize those names in it, my daughters name is also Summer 😉
oh thats great thank you look forward to taking a look ,also the syringe u sell is that ideal for applying the glue i found that straight from the tube onto the converse to much came out thank-you
Hi Natalie
Will have the tutorial finished by Friday you can use the syringe for finer application but for putting a name on a glass you can use a cocktail stick which will apply the glue in a very fine line.
also what size crystals i would need and how many ive got a order in the basket just waiting on what i need for names ect may thanks your help is greatly appreciated x
Hi Natalie
How big do you want the writing to be as in the length to be written in crystals?
I am so excited to have come across this website. I have been wanting to do this for my girls for sometime and I refuse to pay the prices some people charge to make them, I just needed to know the techniques. Thank you so much for this.
Hi Safiyyah
Hope you find the tutorial useful.
hi im not to sure to be honest not to long in length just average really i will just take your advice
Hi Natalie The Tutorial is up now with Summer crystallized for you to see.
Excellent tutorial. I bought a very cool pair of denim blue camo print converse and used plastic AB crystals and they’re SOOOO cute. Under the flash you can see the different colors in the toes. I used a 4mm size crystal but wish I’d used smaller ones. The only thing that sucks is that i can’t find the cap for my E6000 so if I decide to do another pair (and I want a black pair) I have to get another tube.
Thanks!!!
Hi Tracey Glad the tutorial helped be careful using e6000 with acrylic crystals as the silver foil backing melts and the crystals often go cloudy. With acrylic crystals gemtac is a better choice of adhesive. As regards the cap if you squeeze a little out and let it harden then put the glue into a plastic bag it should helps slow down the rate at which the tube hardens.
Hi Khaled, thank you for the information on this website and your thoughtful answers to so many questions.
I invested 77 hours and hundreds of dollars in strassing a pair of canvas Palladium boots. I used a pave’ setting style with no gaps between the ss12 Swarovski crystals (with some smaller ones to fill in tiny holes). I used E6000 adhesive.
Unfortunately, the first time I wore the boots, more than a hundred crystals fell off, especially in the parts of the shoe that flexed when I walked. I was devastated.
I am wondering if I were to coat the shoes in Mod Podge gloss lustre, would that prevent the crystals from falling off again? And would that diminish the sparkle of the crystals? What about Mod Podge Outdoor — the shoes are part of a costume I would be wearing outdoors, so the water resistance would be great but would the Outdoor formula of Mod Podge cloud the crystals or reduce their sparkle?
Thank you for any advice. After all the work and money I sank into these boots, I am intent on finding a way to make them wearable. Or perhaps they will have to be retired to art objects.
~Geri
Hi Geri
Sorry to hear about the crystals coming free. I haven’t tried Mod Padge but there is an answer on this blog http://modpodgerocksblog.com/2009/07/mod-podge-formula-guide-youve-been.html regarding using mod podge and also a video here on youtube https://www.youtube.com/watch?v=vjih3FYR-9M. My thoughts are that you will need to secure the crystals before using any sealer.
A couple of questions
Has the glue come free with the crystals?
Have they just come free from the part of the shoe above the toe and to the side that flexes of have they come away elswhere also?
Where they have come away from the parts that flex, did they come away when putting the shoes on/off or from excessive bending or just from general wear?
Did you waterproof or spray the shoes before applying the crystals?
Can you send me a picture of where the crystals have come loose info at crystalandglassbeads dot com If I can see how you have applied them and the areas they have come loose hopefully can try a test with different glues and application methods to see if a stronger bond can be achieved.
Thanks for your swift reply and spirit of helpfulness, Khaled.
- The glue did not come free with the crystals. The glue is still there, but the crystals popped out of the glue.
- Mostly the crystals fell off across the tops at the junction between toes and foot, some on the sides at the junction of the foot and ankle, and across the back at the junction of foot and ankle. So most of the crystal loss was definitely attributed to the flexion of the shoe with walking.
- I did not waterproof or spray the shoes before applying the crystals.
I emailed the supplier where I got all my Swarovski crystals to get their opinion. They said that the Mod Podge would indeed dull the sparkle of the crystals, and that Mod Podge might not solve my problem of crystals popping off. Further, they said that they do not recommend E6000 adhesive for a project like this because eventually the glue will eat away at the foiling on the back of the crystals! EEEEEK! Instead, they recommended using Devcon two-part epoxy.
So my plan is to repair my strassed boots using the Devcon adhesive (I have to wait until I can get some PVC gloves because Devon is even more toxic than E6000, and in addition to wearing a respirator and using good ventilation, you can’t let it touch your skin or contaminate your clothes) and put the finished boots under glass to enjoy as an art piece until the day when the E6000 eventually corrodes the crystals. I can’t believe so many of the strassing tutorials online recommend using E6000 if eventually it will eat the foil backs of those thousands of Swarovskis on all our shoes.
And to replace the strassed boots in my costume, I’m going to wear custom painted Converse shoes instead. It seems like acrylic paint is the only thing flexible enough not to fall off or crack from the flexing of canvas shoes.
Hi Geri
E6000 won’t eat away the foil backing on Swarovski or Preciosa crystals but it will eat away the backing on acrylic crystals because the foil is made of plastic (it also clouds the crystals), if e6000 was so corrosive it wouldn’t be the preferred choice for people crystallizing with. So the information you have been given by the supplier isn’t correct. If the crystals have come away and the adhesive is still there it sounds like the lack of a gap between crystals is forcing the crystals to dislodge their neighbour as the canvas material flexes. Im going to try a test with a few crystallized squares on canvas and try the crystals closely packed together and with a slight gap, also gluing the surface first and then applying a second coat of adhesive with the crystals on so see if an added later of glue will give a stronger bond that is more flexible. Once the test if complete I will do a post for you so that you can see the results. The Devcon adhesive seems to be used for industrial purposes did the supplier give you a name or number for the adhesive they recommend as the epoxy adhesives I looked at on their site all seem to be used for bonding, rubber, metal, glass, ceramic, wood concrete etc. There doesn’t seem to be any for canvas/fabric?
Thanks for your reply, Khaled. I can’t wait to find out how your test goes! I think you are absolutely right that my crystals popping off happened because I packed them too close together on the shoe, so they struck against each other when I walked. I should have left slight gaps between each rhinestone.
It makes sense that the supplier recommended Devcon to me, since I have retreated from the desire to bling out the canvas sides of the shoes, and now just want to cover the plastic/rubber toe caps.
Hi Geri
Will post the results as soon as the test is complete. If you try the Devcon let me know how you get on and if there are a few similar adhesives it will be worth seeing how they compare.
Hi I have bought some nike dunk wedges and wanted to do clear crystal all over with fuschia tick it’s for my wedding but after reading some of this it seems like such a big job I don’t know what to do now as I really love them I just can’t afford to spend so much getting them done can any1 help
Thanks
Claire
Hi Claire
Its very easy to do we have a tutorial for crystallizing a Nike Tick which you can find here you can use 2 or 3 crystal sizes depending on your preference. http://www.crystalandglassbeads.com/blog/2013/how-to-crystallize-nike-blazers.html Im not sure what adhesive would be best to use as it would depend on what the tick is made from it would either be e6000 or gemtac.
Hi ya I wanted to do silver bling all over n pink bling tick
Hi Claire
We have a tutorial for crystallizing a Nike tick which you can find here http://www.crystalandglassbeads.com/blog/2013/how-to-crystallize-nike-blazers.html It’s easy to do and for the best result use or 3 crystal sizes so that you are better able to fill the tick completely without gaps. It doesn’t matter what size you use although its worth measuring the width of the smallest part of the Nike tick to make sure eithet a single or combination of the crystal sizes you have will provide a good fit.
For a toddler size 9 shoe, would you recommend the ss12 or ss16?
Hi Lisa
For a toddlers shoes I would recommend ss12 it just looks a little nicer on smaller shoe sizes.
Just completed one shoe of a Toddler size 6 and needed 111 SS 12s, NOT 74… So now I actually need to go and purchase more to complete the other shoe. 🙁 Please update the chart to reflect that for others.
Hi Jessica
Apologies if the number is different, the chart is based on customer feedback like yourself when we are given crystal numbers for each shoe we add it to the chart or update the information accordingly. Thank you for letting us know I will update the information now.
hi i am so sorry you get asked the same question. A toddler 4 should use 3mm or 4mm sized swarski crystals. I order them by mm not the ss way listed here
Also the havianas are always a 4mm correct? I also like the 4mm because thats the size of the line that runs along the side of the shoe that I cover when doing a childs shoe.
the 3mm are so small for someone with manly hands like myself,
Hi You can use the 4mm but my preference is the ss12 for the smaller shoe sizes I just think the 3.2mm look a little nicer as they are a tiny bit smaller so more crystals cover the toe. For the Havaianas the most popular size is ss20 then ss16 for adults and ss16 for children’s. I also have big hands so find using the Crystal Katana or jewel setter much easier to use for picking up crystals.
How would you suggest doing UGG boots?
Hi Nicole
I have tested on fake UGG Boots, e6000, epoxy resin and gemtac. The bond with epoxy resin is very strong but if you get the glue around the crystals it does stain the suede a darker shade which isn’t very desirable, it can also only be applied in spots as if you try and glue up a whole area the adhesive will crack from being over flexed after a lot of use. Gemtac the bond is not too bad and it seeps into the materials fibres quite easily but once dry the crystals can be picked off quite easily. E6000 on the other hand if you apply the crystals quickly they will come off just as quickly through wear and tear, because the glue is thick it doesn’t seep into the fibres so easily so only bonds poorly. If you press the crystal into the adhesive and hold it in place for a minute or so which forces the glue to seep into the fibres and the crystal with it the bond once cured is very strong. The downside is that this process takes a long time holding each crystal in place to get a good bond and may not be cost effective ( I have also tried applying several crystals in a block and then using a small ruler to press down on them all for a minute) after the glue dried the bond was very strong and I couldn’t pick the crystals away. Hope this helps.
Hey i really want to try this. Do i use the same method to put them all over the shoe? I want to cover the who shoe size 6 womens. What do you suggest in size stones?
Hi Kay it’s the same method although it looks a little better to use two or three crystals sizes and filling in the gap like a jigsaw with the most appropriate crystal size. You can place the crystals with very little gap or a small gap depending on the effect you are trying to create http://www.crystalandglassbeads.com/blog/2012/swarovski-crystal-shoes-tutorial.html
My daughter size 8.5 adult converse I just blowing nged out he toe with swovoski bling for her sweet 16..altho im not done it does take time and patients to do this..I used at least 200 swvosky gems
Hi Valerie
Many Thanks for letting us know and hope you for the tutorial useful.
hi, i love your sneakers, i would like to know how man crystals i would need to do an adult sneaker size 8 and 9?
Hi Vernell
I haven’t crystallized size 8 or 9 apologies but at a guess I would say approximately 200 crystals per toe. If you do get round to crystallizing a size 8 or 9 I would be very grateful for some feedback as to how many crystals it took per toe so that I can update the chart.
How much glue does it take to do this? Can I use the .18 fl oz tube, or do I need 3.4?
Hi the 0.5oz tube will be plenty if you are spreading it on if you are just using dots for the crystals then you will get away with the tiny 0.18oz tube ( I would recommend the 0.5oz though).
A few of us baseball moms want to bling up some converse by using red crystals for baseball laces and clear crystals to fill in the rest. By looking at picturees, it seems the SS12 might be too large. Do you have any ideas what size to use and how many for womens size 8 shoe? Like this one …
Hi Heidi from the picture it look like they have used a line of 23 crystals along the top of the toe if you measure the length of the area to be crystallized along the top of the toe and divide by 23 you will have an idea of the crystal size used. I would guess that it’s ss12 and ss9 used for providing the detail.
What size crystals would you recommend for making baseball design on toe… Just two red laces and rest crystal.?
Hi Heidi
ss12 and ss9 size crystals would be better for a more intricate design, the ss12 for the main crystal size and the ss9 for the filling in gaps and detail.
Hello! I have just finished doing my own pair of converse and this was how many crystals I had…
(Rows were counted as pictured in the tutorial)
Row 1: 20
Row 2: 12
Row 3: 16
Row 4: 13
Row 5: 11
Row 6: 8
Row 7: 5
“Row 8:” This was some small filler stones and I used 3 to fill in the gap.
I used 85 crystals on the toes of each shoe.
I used 5 mm crystals for my shoes, on a women’s size 9. I believe the smaller filler stones were 3-4 mm. I found knock-off (not Swarovski) crystals from my local Walmart and the are shiny I like them just fine. They came in a pack of 145 crystals for $3. I also crystalized the bottom black racing stripe on the bottom of the shoe and that took 40 crystals per side. And the canvas stripe above on the back where is says “Converse All Star” and that took 27 crystals per shoe.
Can you provide a pic? I like the breakdown of numbers you did. Thx! I am working on my bridal pair & won’t be using the real crystals either. Lol!
Hi Nessa
I don’t have a picture sorry of a size 10.5 toe or the size of the toe. What you can do though to get an approximation is print out the ss16 sheet from http://www.crystalandglassbeads.com/blog/2014/flatback-crystals-guide.html place it over the toe and draw around the outline. You can then count how many crystals are within the toe. The layout will be slightly different but will give you a approximate guide as to how many you require. If you are using acrylic crystals be aware that if you use e6000 it will melt the crystals.
Hi. I like the look of two row of crystals going up the back of the converse. I’m working on a toddler size 7 converse. I w h thinking of using the ss12. Do you recommend the same glue as it’s on the fabric of the shoe? Love your tutorial.
Hi Tina
Yes ss12 would be a good size I would opt for e6000 adhesive for using on the side of canvas. Have a look at this post for adhesive test on canvas
would using a hot glue gun work? i mean i get it wouldnt be as strong as the e6000 stuff but would using hot glue work?
It would depend on the glue sticks and what materials they are intended to bond with. E6000 is tried and tested and works with crystals and rubber, you would have to make sure the stick is suitable for bonding rubber and metal foil and then wait and see how long the bond lasts I’m afraid as I haven’t tested on converse.
Hi, What size crystals for an adult size 5 please 🙂
Hi Claire
I would opt for ss16 (4mm) crystals for adult size 5.
I am tryna do my bridal chucks. I wear size 10.5 in adult women sizes. Hoe many crystals do I need for each toe? Also what size (mm) crystals would I use? Wedding/reception is in 2 weeks. Please advise.
Thx,
Nessa Kingdom-Lewis
Hi Nessa
I would use ss16 4mm crystals for the toe I cant tell you how many crystals you would need sorry as I haven’t crystallized that size before.
Regards
Khaled
I was wondering how many crystals for a man 5.5, which is a woman 7.5 converse and what size please
Hi LaDonna
ss16 would be a good size to use as regards how many per toe I haven’t crystallized that size sorry but I would guess 500 x ss16 crystals should be enough to do both toes.
Hello,
I am thinking about buying the leather converse for prom and I wanted to add crystals, how many crystals would you recommend for a adults size 8 and what size crystals, also I wanted to add crystals to the strip at the back and these little bows but I wasn’t sure if the crystals would stick or just rip the leather effect off. Thankyou
El
Hi Elwooding
ss16 would be a good size I haven’t crystallized a pair of size 8 converse so I can only give you a guestimate but it should take 400/500 crystals for a pair of adult size 8 toes. If you let us know once they are complete I will update the chart for your size. You can add crystals to the strip at the back if you measure the width and height of the strip and divide by the number of rows you want, you can work out how many crystals you need. i.e. If you want to cover the entire back strip and the width is 21mm and height 115mm then 21mm/4mm (ss16 4mm) = 5.25 (number of rows using ss16 4mm). So you could have 5 rows of ss16 crystals (115 / 4 = 28.75) with 28 crystals per row 5×28 = 140 crystals PER strip (pair of converse would be double the amount). If you measure the height and width of the size 8 strip you can work out an exact amount or just have one or two rows on the back you don’t have to cover the entire strip to give it some sparkle. I haven’t seen the bows sorry so cant advise. One thing to note is that there is no adhesive that works very well on leather. Canvas and rubber i.e standard converse is a lot easier to bond crystals to. Hope that helps. Any other questions just let me know and I will be happy to advise if I can.
How long does it take to fully bling some converse
Hi Avery
By fully bling do you mean the entire shoe or just both toes?
Fantastic tutorial! I am doing a pair of Size 9 toddler shoes. What size crystals would you recommend? I am doing the toes and the strip up the back? And approximately how many should I buy?
Hi Nicole
I would recommend either and ss14 (between and ss12 and ss16) they are more cost effective then an ss12 but slightly smaller than an ss16 as regards how many I cant tell you exactly sorry but 200 crystals should be enough for the toe’s as regards the strip up the back measure the length and width and say the strip is 20mm wide divide by 35mm for the ss14, 32mm for the ss12 or 40mm for the ss16. So for 20mm width you would have 4 rows of crystals and measure the length and again divide by the size of the crystal. Hope that makes sense if you still aren’t sure just ,measure the length and width of the back strip and what size crystals you intend to use and I will advise how many you need. You can see ss12 on a toddlers size 3 here http://www.crystalandglassbeads.com/blog/2014/how-to-crystallize-baby-converse-tutorial.html for size comparison.
I checked out the toddler shoe, i think you are right about using the ss14. I’m going to order everything today and see how it goes! Thank you for your help and for such a gerat tutorial!
Hi Nicole will have to send us a picture once you complete the shoe.
I blinged up my Havianas with crystals and they look fab… I’ve sooooo many compliments
Hi Jane
Im glad the tutorial helped the feedback is much appreciated : )
Hi Jo, Gemtac or epoxy resin should both provide a good strong bond for crystallizing a skull.
Thank you
Good afternoon.what size of crystals would you suggest for converse uk size 4 5 6 7 .thanks
I would go with ss16 if it’s adult size converse for those sizes or ss12/ss14 if they are kids sizes. You can get away with ss16 on kids sizes as well but more crystals look a little sparklier on smaller toes.
Hi see when you crystalize converse for kids with them gettin dirty and you need to wash what way does this work with the diamonds?
I usually stick them in a pillow case in a wash with towels or other soft items so that the crystals don’t get too much of a knocking around then in the washing machine.
I want to make a crystal softball on a converse style shoe. All I could find in the right color were hotfix crystals . How can I adhere them to the rubber??
I’ve seen what you said about the e600, but these were the only ones I could find in the right color and I didn’t know anything about the difference in crytals.
Thanks in advance!
It would be non hotfix with something like e6000 adhesive would be the strongest option. Hotfix has a heat sensitive coating on the back of the crystal which is only suitable for fabrics, paper and card.
Is SWAROVSKI the only brand of flat back crystals? I am doing 10 pair of Converse shoes for a wedding and I want to find the best price I can.
Thank you
Hi Marilyn
No Swarovski isn’t the only brand or make of flathacks on the market, there are also Preciosa, DMC, Korean, chinese etc…..
After applying the glue to the shoe surface, will it stay wet long enough for you put the crystals on?
Hi Laura
Yes by applying a small amount of adhesive at a time it will stay tacky plenty long enough to position the crystals.
How many crystals would it take to fill the whole converse woman shoe, full tongue, sides/rear, full lace area, and toe? Just for maximum amount let’s say it’s a size 12 women, not high top.
Hi Bestie
As regards how many it would take I have no idea sorry but I have made some sheets for this purpose. If you go to http://www.crystalandglassbeads.com/blog/2014/flatback-crystals-guide.html scroll down to printable size sheets then print out. You can then wrap around the area you intend to crystallize and either mark off with a pen/pencil the outline or cut out the shape. Count the crystals and you have a pretty accurate estimate for how many crystals you need.
Where do you purchase your converse? Do you get them wholesale? Thanks
Hi Sheila
Unfortunately no sorry I just order converse online or pick them up from Office a shoe retailer.
What is the best way to cover an entire converse high top? One place I read that it is fine to use e6000 with the crystals on the canvas, but another comment said to use hotfix crystals. are either ok? I was planning just to glue them with the e6000. Also, can I use larger crystals such as 6 or 7 mm? I thought it might be easier to cover such a large area with bigger stones. And one last question, my daughter’s dress is an aqua color. I thought it might work to dye the high top to match and then bling it out with the crystals. I figured this way I don’t have to cover every last spot of the sneaker. If it’s all white then I feel that I have to cover the entire sneaker in crystals or it wont look good with the dress. Can I dye the sneakers first and still put crystals on and what do you think of this idea?
Hi Fran
You can use either e6000 or hotfix to cover the canvas part of high top’s just be aware that with either method the crease area can be problematic especially if they are used for dance/sport of any activity where parts of the shoe are put under stress. You can use larger stones but the bigger the stone the more likely it is to come free as there’s a larger area of potential movement under the crystal. Yes you can dye the canvas before applying the crystals but do a bit of research before hand as to the dye coverage as some I have tried come out very streaky ; ) also some give a waterproof coating that may be waxy.
I’m wanting to stone toes of a toddlers size 5 converse it is for a 17 months old, I have a few questions, what size of stone do I use and what size of fillers, how many of each? Is e6000 the best glue to use? Or is gemtac better for that age, they will probably be washed in washing machine, I’m worried about e6000 once this glue is dry is it still harmful if say toddler was to put anywhere near her mouth, are the Swarovski stones glass? are these the best ones to use for toddlers? if I use a cocktail stick to put dabs of glue on will this be enough or is it better to put a line of glue and lastly does it look nice when you use glitter in the spaces between stones or does this ruin the effect, thank you
Hi Ang
1. ss12 would be a nice size have a look at: http://www.crystalandglassbeads.com/blog/2014/how-to-crystallize-baby-converse-tutorial.html.
2. As regards to how many you will need im not 100% sure but it will be approximately 100 - 130 per toe with a filler size of ss9 or you can just space out the crystals.
3. Yes the swarovski stones are glass and really not advisable to let a child swallow them or put them anywhere near their mouth. For this reason I wouldn’t use e6000 as its toxic gemtac is a strong adhesive that is non toxic and a safer option.
4. You can use a cocktail stick to put dabs of glue on for the crystals but if you are going to add glitter between the crystals it may be a better option to do away with spacer crystals and just use glitter to fill any gaps. You can evenly distribute the space between the crystals in each row so any gaps are tiny and fill in with glitter.
Hope that answers your questions.
Can I use acrylic jewels from walmart? It doesn’t say wether there Non Hotfix or not so I’m just trying to make sure there ok to use and won’t mess the shoe up or come off. Thanks
Hi Shalana
Acrylic crystals will be fine to use for your project as long as you use a suitable glue. If they have a foil backing this will be plastic and using an adhesive like e6000 will eat up the backing and cloud the acrylic faceted part of the crystals. Sooo just make sure you use a suitable adhesive for the surface you are bonding to and that wont melt the flatbacks.
Hi is there anywhere on the net I can buy the wand? Can’t find it anywhere please help as scared to start x
Hi Martin you can get the tools here http://www.crystalandglassbeads.com/65-miscellaneous
Hello,
I would love to know if this can used to decorate or brand bottles .
Hi Stanley
Yes you can crystallise a bottle see: and will be the same principle for bottles.
Hi I wanted to know if you have a tutorial on how to do a Minnie Mouse face on converse.
I don’t sorry.
I have two pairs of women’s converse shoes size 10. What size and how many non-hotfix crystals would I need for each pair?
The length of the top of the toe (horizontal) is 3 and 1/8 inches and the length (vertical) is 1 and 3/4 inches. The other converse (low top) is 2 and 3/4 inches (horizontal) and the length is 1 and 1/2 inches (vertical.
Hi Renee Im not sure on the number of crystals apologies, haven’t done converse for a while as regards size ss16 is the most economical size to use but ss12 will look sparklier but take a lot more crystals.
Non-Hotfix foiled or Non-Hotfix with foil for converse toes
Hi Renee Non-Hotfix foiled or Non-Hotfix with foil are both the same thing, not sure if you meant, unfoiled or hotfix as the alternative…..both of which would be unsuitable. Its the non-hotfix foil backed crystals you want for gluing on a converse toe. Hope that helps.
Hi can you tell me what size do I use for a size 8 converse in woman? SS16 or SS20? And do you know approximately how many per toe?
Hi I would use size ss16, not sure how many per toe though.
Good Day,
This would be my very first time putting rhinestones on anything…I’m trying to do a so on a size 4 (big kid) pair of converse. My daughter is 9 and she wanted to do white sneakers for a beach wedding in the Caribbean next week. can you suggest what size crystals I should use and how many if I wanted to do the entire sneaker. Thanks in advance.
Hi Opal
I have no idea how many crystals it will take apologies but you will likely need a few factory packs to cover the entire surface of the shoe. As regards size ss12 is a nice size to use or ss16 if your on a tighter budget and looking to keep the cost down using just one size. I would recommend googling crystallized converse and having a look to see the effect you would like to achieve. Using 3/4 sizes will give a completely different finished result than to use just one of two sizes. Again spacing the crystals out and using a few different sizes can make the project a lot cheaper in cost but you can still get a great result. If you do intend using a range of crystals I wouldn’t go under size ss9 if you intend using e6000 adhesive and wouldn’t go over ss20 in size as larger crystals tend to dislodge a lot easier from use. You can get a printable size sheet from here.
Hi, quick question how many crystals do you think it would take to cover an entire shoe. I would be bedazzling converse. im trying to bedazzle my daughters shoes, but I don’t know how many crystals I need.
Hi it would depend on the shoe size, size and size of crystals used.
Just made my own pair size 11 women’s 255 ss12 crystals on the toe.
Hi Jen many thanks I have just updated the chart and believe an adult size 11 US is size 9 UK.
How many crystals for size 9 woman’s USA? And also can we use hot glue instead of the glues you mention?
Hi I don’t know the exact number of crystals for US size 9 apologies but will be less than 255 ss12 crystals per toe (I would guess 200-230 crystals per toe). If you let us know how many you use I can update the chart. There are many different hot glues for different surfaces, if the one you have is for bonding rubber or plastic you will be fine. If not there is a new version of E6000, E6000+ which is non toxic and would be a good option.