Remembrance Day Poppy How to Crystallize
This tutorial was created by Crystal and Glass Beads
Theere are a number of ways you can crystallize a remembrance poppy with Non Hotfix Flatback Crystals, this tutorial demonstrates how to do so using ss12 and ss16 crystals for the red part of the poppy so that you can see the difference between the two sizes. You can use smaller crystals if you prefer or even a range of crystal sizes if you would like to completely cover the poppy surface with no gaps. For this tutorial we have used Swarovski Elements but you can use and brand you like to achieve the look.
Preparation

Before starting crystallizing the poppy we are going to have a look at choosing the best Swarovski colours for both the green and red parts of the poppy. For the green leaf fern green looks the nicer colour which we will use for the tutorial.

For the red part of the poppy light siam is the closest most vibrant colour.
Start Crystallizing Poppy
To begin with place your crystals on a flat surface faceted face up so that when you are ready to use them all you have to do is pick them up and add them to the adhesive.

1. Add some adhesive to centre of the poppy, I use a cocktail stick to apply some gemtac glue but you can use e6000 if you prefer.
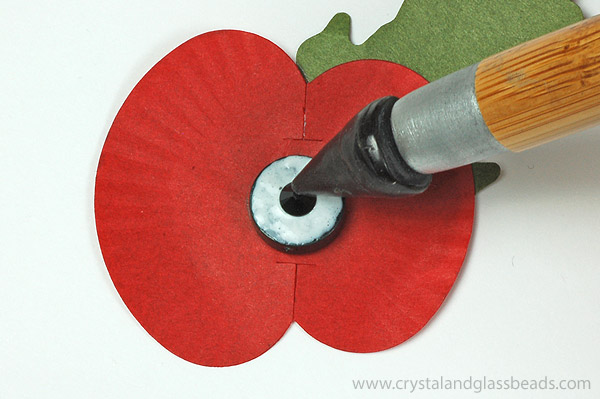
2. Pick up your ss16 Jet crystal with an applicator tool. For this tutorial the Crystal Katana has been used, then apply the crystal to the centre of the poppy onto the adhesive.
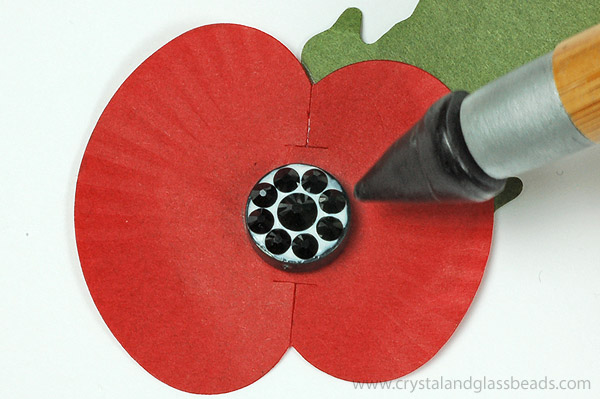
3. Apply a further 8 crystals size ss12 around the larger centre crystal to cover the black part of the poppy, place each crystal onto the adhesive and then press down to ensure that the crystal is firmly bonded to the adhesive.

4. Apply adhesive around the outer edge of the poppy in a thin line, we are going to crystallize the outer edge first to ensure that the we get a nice neat line of crystals around the side of the red petal.

5. Pick up your first crystal (ss16 light siam has been used in the picture above) and position at the start of the adhesive then press down on the crystal so that it gets a good bond with the glue.
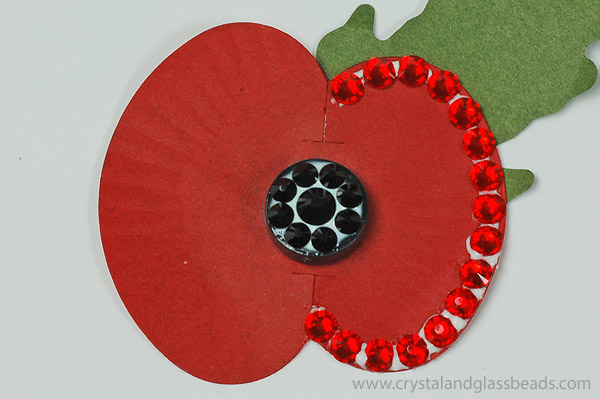
6. Continue adding crystals along the outer edge of the red petal ensuring that the crystals just touch the edge and don’t go over (if you run out of adhesive add more then the crystals).

7. Finish off adding the ss16 Light Siam crystals to complete the outer edge of the red petal.

8. Once the outer edge is complete add some glue to the inner part of the petal and start to fill in the red with crystals. If you want to achieve a tight design with no gaps you will have to use more than one crystals size. This tutorial utilises just one crystal size for the petal and another for the leaf, after the ss16 poppy has been completed you will be able to see the ss12 version below (which I personally think gives a nicer finish).

9. Continue adding light siam crystals and glue.

10. That’s the first half of the petal complete.

11. The second half is now complete. The alternative method is to crystallize the outer edge and then a ring of crystals around the black centre, once this is complete you keep adding rows of crystals to fill in the gap. To crystallize the poppy this way you will need two or more crystal sizes as neither ss12 or ss16 will give a perfect fit using just the one crystal size.
NOTE ..By crystallizing the outer edge and then filling in the centre as best you can the end result looks more natural if you intend to use just the one crystal size than the other method we have just mentioned.

12. We are now going to use Fern Green ss9 crystals to fill in the green leaf part of the poppy.

13. Using the same technique fill in the leaf as best you can. If you want a tight fit around the leaf part of the poppy you will need to use smaller crystal sizes such as ss7 in conjunction with ss9 to fill in all the gaps.

14. Continue working your way around the leaf adding adhesive and then the crystals.

15. That’s the last of the green crystals applied and now its just wait for the glue to dry.
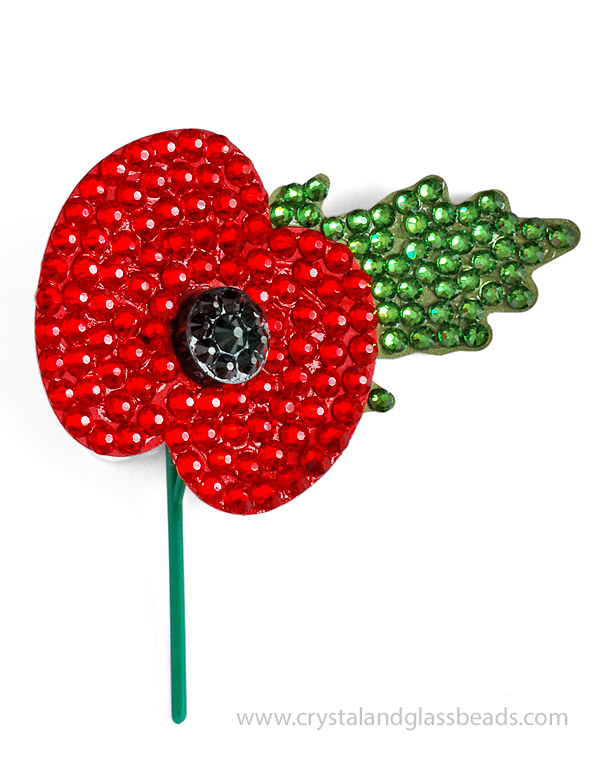
Complete… One Swarovski Crystallized Poppy, once the glue is dry we push the stem back onto the poppy so that its ready to use. For the above poppy we have used….
Red: Light Siam ss16 x 97.
Black: Jet ss16 x 1 & ss12 x 8.
Green: Fern Green ss12 x 45.

a. So here we can see an alternative pattern for filling in the centre black part of the poppy with crystals and for the above poppy we have used 14 x ss9 Jet crystals which I personally think looks nicer.

b. Going through steps 5-7 above we have used the same technique but with ss12 Light Siam crystals this time.

c. Again I have filled in the red part of the leaf. (If you intend to apply the ss12 crystals in tight rows with no gaps you will have to use ss16 crystals to fill in the 4th row from the centre as the ss12 crystals are a little too small and will leave a gap)..
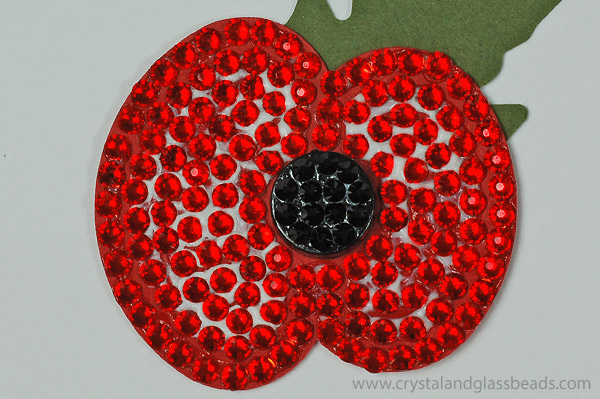
d. That’s the ss12 Light Siam complete (steps 8-11 above).

e. That’s the fern green ss9 complete of the green leaf part of the poppy. There is a better fit on the leaf this time and although its still ss9 used we have used 3 more crystals on this leaf. Now its just wait for the glue to dry and re attach the stem to the poppy.

Complete. Swarovski Crystallized Remembrance Day Poppy. The crystals we have used are:
Red: Light Siam ss12 x 144.
Black: Jet ss9 x 14.
Green: Fern Green ss12 x 48.
Thank you for reading our tutorial I hope you found it useful and if you liked, please consider giving us a facebook, twitter or Google+ Like or Share which would be much appreciated

 Crystal and Glass Beads Blog Crystal and Glass Beads blog




good morning
I have emailed previously requesting what is the best adhesive to use for havainas flip flop
please
the E6000 has slipped – what is your advice please
thanks
Hi Nouha
I did reply to the last question if you look at this post http://www.crystalandglassbeads.com/blog/2015/which-glue-works-on-havaianas-flip-flops.html you can see what works, what doesn’t and the benefits and disadvantages of each adhesive. Be aware the super glues can destroy the crystals f you are not careful and rubber adhesives can yellow under UV light.
Hi
Can you help I have tried this out and very pleased but when we come to pin poopy on I am finding it’s to heavy do you know a way we can Secure poppy onto garment
Thank you
Hi I just pin it through the green plastic stem just below the bend. The pin goes: through your top fabric, through the stem and then back through your top fabric again. I have used the poppy multiple times and it sits nicely. If you find this difficult you can use thin wire to secure the same area (top of the stem) to a safety pin.