
Which adhesive is the best for applying Swarovski Crystals to canvas
This tutorial was created by Crystal and Glass Beads
Canvas adhesive test to see which glue provides the strongest bond with Swarovski flatback crystals. We have tested a number of adhesives but the three comparisons we are most interested in are e6000, gemtac and hotfix crystals. The test will also look at various adhesive application methods and if one method provides a stronger bond than the other.
Preparation

1. For the purpose of the test we have drawn out 10 separate squares to test each adhesive onto which 50 crystals will be applied using a different colour for each square (this is to ensure that crystals don’t fall off from one adhesive and stick to another square).

2. For the first test square we are going to apply e6000 with a syringe for precision application. Remove the plunger, screw on the tip and squeeze a small amount of adhesive into the tube then replace the plunger and squeeze out any air.
Test

3. Apply a small amount of e6000 from the syringe and then place the crystal onto the adhesive and press down to ensure that the crystal gets a firm bond with the glue. It’s very quick and easy to apply crystals in this way you just have to ensure that you firmly press the crystal down into the adhesive after positioning. If you don’t have a syringe you can use a cocktail stick which is also fine enough to allow the used to apply tiny dots of glue for ss5 crystals and bigger.

4. Once we have finished applying the crystals it’s a good idea to plug the end of the syringe, in the image above you can see we have used white tac which stops any air from getting into the nozzle and ultimately slowing down the rate at which the adhesive in the nozzle thickens. Without plugging the end it will thicken in a matter or minutes making it more difficult to work with smaller crystals.

5. So that’s the first 50 crystals applied with e6000 using precision application so that each crystals has it’s own adhesive spot that doesn’t connect with any of the surrounding crystals.

6. One of the issues you often hear with adhesive is that if comes free from the surface its being bonded to so for this test we are going to try applying 2 layers of adhesive. The first layer of e6000 adhesive is applied with a spreader (old Blockbuster card) which works/forces the adhesive right into the fabric to give a good strong bond between the glue and canvas.

7. After an hour the adhesive is pretty much dried so we are now going to apply a second coat of e6000 adhesive in the same way (with the spreader) and then apply the crystals to this second layer of adhesive. The purpose of this test is to see if it’s possible to achieve a stronger bond by forcing the adhesive into the fabric and then bonding the crystals to the adhesive layer rather than directly to the canvas.

8. The next test square we have used the spreader application again but just the one coat this time, using Shoo Goo which is pretty much the same thing as e6000 under a different name. We spread the adhesive on them applied a crystal, pressed down firmly on the crystal and then move onto the next one ensuring that we leave a space between the crystals. Again it’s very easy to apply and even though it’s supposed to be the same thing as e6000 I do find that Shoo Goo seems to be slightly thinner in consistency and therefore slightly easier to apply. Like e6000 it has the unpleasant nasty fumes that stink!!

9. For this test square gemtac adhesive has been applied which goes on white and dries clear, it’s very easy to apply and does tend to shrink as it dries so if you put it on a little thickly it takes care of itself once it dries (although you still need to ensure that it doesn’t go over the crystal face).

10. As gemtac is one of the more popular glues, like the e6000 test in square 2 we have applied some gemtac with the spreader and left to dry. Once the glue has turned clear we have then applied a second layer of adhesive and set the crystals into the adhesive, placing them on the glue and pressing down on each crystal with the end of the Crystal Katana to ensure that it’s secure. (Testing to see if it’s possible to get s stronger or more flexible bond with two adhesive layers than one)

11. The next adhesive tested is Metal Glass and More (manufactured by Beacon adhesives) according to the chart it’s supposed to work with canvas material so we are going to use the spread technique. Once the adhesive has been spread we apply the crystals ensuring that each crystal once placed is firmly pressed down into the adhesive to give a secure bond. Metal Glass & More does have strong fumes and from working with the glue previously I can tell you that it starts to skin after a few minutes which means that once it starts to cure if you move the crystals at all it makes a real mess, so once you place your crystals leave them alone. The glue itself is thin in consistency, clear and easy to work with.

12. Next is Crafter’s Pick Ultimate Adhesive which looks like gemtac but I find is a little more like set yoghurt when it comes out of the tube and thinner in consistency when spread. Its a very easy nice glue to work with and doesn’t have any unpleasant, strong or nasty fumes.

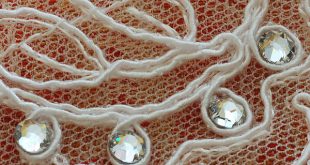
13. To see if proximity is an issue in block 8 we are again going to test gemtac glue applying the crystals without any gaps between them, to achieve this we have offset the crystals to create as tight a fit as possible.

14. As you can see 50 crystals without any gaps takes up a lot less space than previous test squares. Once the glue is dry a comparison between crystals applied in close proximity and those with a gap between the crystals will hopefully show if there is any difference in bond strength when the canvas is flexed. Aside from bond strength and testing to see if crystals can be picked off the material stressing the bond strength by flexing the material can also be an issue which is what happens when canvas shoes are worn. Placing the crystals in close proximity to each other vs having a gap between the surrounding crystals will help to show if proximity causes any issues/weakness.

15. Again we are using the same technique as the previous test square but with e6000 adhesive this time.

16. The final square has 2038 Swarovski hotfix crystals applied using a Kandi Professional Applicator tool. i.. To apply the crystals we place the rhinestones onto a flat surface, faceted face up. ii.. Attach the correct size tip to the end of the applicator. iii.. Turn on the applicator tool and leave to heat for a few minutes. iv… Pick up the crystal with the tip tool by touching the tip over a crystal. v… Press the crystal down onto the canvas material for 2 seconds and then remove, repeating the process for the next crystal.

17. That’s all the test squares complete, now they will be left for a few days to ensure that all the adhesives are completely cured.
Flex Test

i. If crystals are going to be applied to Converse or other forms of canvas footwear the most likely way that crystals will be lost is from the continuous flexing and rippling of the materials surface whilst being worn. To simulate this movement each square will be flexed or rippled like a wave travelling from one side of the square to the other, back and forth for a timed period of 5 minutes for each square to simulate the kind of stresses footwear will be subjected to (For most parts of the shoe this is EXTREME as the fabric wont stress this much except around the crease of the toe when the toes are bent and the back of the heel).

ii. As can be seen from the results above Hotfix or E6000 offer the strongest bonds from the adhesives tested, also applying the crystals closely together does have a big impact of crystals being dislodged. Precision application also makes a big difference when applying crystals to canvas.
Bond Strength Test

iii. The second test is the bond strength test where you would generally loose crystals from wear and tear, to test the bond strength we try to rub over the crystals to see if they are easily removed and the see how easy it is to pick off the crystals. If crystals are easy to rub or pick off they generally are not going to last very long on kids footwear.
Conclusion
When crystallizing Canvas material with Swarovski rhinestones to provide the strongest most hard wearing bond using E6000 or hotfix crystals are the recommendation. If there is going to be a lot of flexing in the canvas as on footwear leaving a slight gap between crystals is also a recommendation so that crystals don’t press against each other dislodging their neighbour. It’s also advisable to apply the crystals with their own individual glue dab which seems to give a stronger bond than gluing the whole area and then applying the crystals.


Great info thank you
Glad you found it useful and thank you for the comment.
Thanks for this info, I put crystals on the back part of converse, but they’re coming off!!
Hi Gabriela Which adhesive did you use and what size crystals?