The completed Swarovski Flower Mother’s Day cards.
1. Swarovski Flower Handmade Mother’s Day Card Tutorial
This tutorial was created by Crystal and Glass Beads it’s intended to give you some ideas for creating your own personalised Mother’s Day card using Swarovski flatback crystals. The greetings blank or card size used for this tutorial is 145 x 145mm which is 6″ x 6″ Approx. The cards printable templates found below can be edited to fit on other sized cards or amend to change the wording or design. If you are used to using Hotfix crystals and an applicator tool it can be used instead of the adhesive and non hotfix crystals used for the cards below.

1. What you will need:
- A … Download and print the template: Card template using 145 x 145mm greeting card blanks (Closed card size).
- B … A suitable adhesive, for this tutorial we are using Gemtac glue.
- C … A tool for picking up the crystals, Magic pick mini, Jewel setter, Katana tool or tweezers.
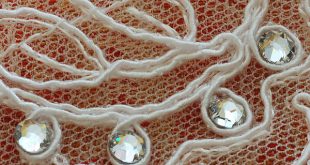
- D … A ruler or something with a straight edge is handy but not essential. I used to shuffle the crystals to turn them faceted face up rather than have to pick up each crystal to turn it over.
- E … A nail dotting tool, cocktail stick, orange stick, sharp pencil or something with a tip/point for applying small dots of adhesive.
- F … Flatback crystals. You can find our range of Swarovski flatback crystals here.

2. Once the card is printed out apply a small dab of adhesive to the centre dots of the letter M using a nail dotter, orange stick, cocktail stick etc.. Then apply the ss12 crystals of your choice using a pickup tool, for this tutorial we have used the colour Moonlight.

3. The Letter M takes 17 x ss12 (3.2mm) Moonlight or whichever colour crystals you decide to use. Once the crystals are in place make sure to press them securely onto the adhesive with the end of the tool or an orange stick and make any slight adjustments so that they cover the template circles.

4. The word MUM takes 45 ss12 crystals in total, continue the process of adding adhesive then crystals until the word is complete. Although the circles are smaller than the crystal intended to be used if you don’t use water resistant inks the colours may bleed slightly.

5. So for our first flower I’m going to use ss5 Cyclamen Opal for the centre and the 5 petals will be ss5 Light Amethyst.

6. Again, use the same technique, apply a tiny glue dot in the centre of each circle.

7. Add the crystals and make any final positional adjustments, pressing the crystals firmly into the adhesive.

8. That’s the first flower complete, now continue on to the remaining 3 flowers that are the same.

9. We used 24 x Light Amethyst ss5 crystals for the 4 flowers petals and 4 x Cyclamen Opal ss5 crystals for the flower centres.

10. Flower 2 is comprised of a single Montana crystal for the flower centre and 8 x Padparadscha crystals for the flower petals.
8. Again using the same process add the glue and crystals. There are 3 of these flowers so a total of 24 x ss5 Padparadschacrystals and 3 x Montana ss10 crystals are required.

9. Flower 3 used 5 x Pacific Opal ss9 for the petals and one Rose Peach ss5 flatback crystals for the flower centre.

10. There are 5 of these green and pink flowers so we will need a total of 25 x Pacific Opal ss9 Swarovski flatback crystals and 5 x Rose Peach ss5 crystals in total. If you use another crystal brand the names of colours may be different which isn’t a problem. Just make sure to use an appropriate crystal size to fill the gaps.

11. Onto flower number 4 where we have used 5 x ss10 light sapphire which is a pale blue for the petals and 1 x Chrysolite ss7 for the centre, which is a pale green.

12. There are 6 of these flowers so require 30 x light sapphire ss10 rhinestones and 6 x ss7 chrysolite crystals to complete the flowers.

13. Flower number 5 is made up of 6 x ss10 Aquamarine crystals for the petals and 1 x ss12 Caribbean Blue Opal crystal for the flower centre.

14. There are only one of these flowers in the design so it’s just the 6 x ss10 Aquamarine and 1 x ss12 Caribbean Blue Opal Swarovski crystals required.

15. Flower number 6 is made up of 5 x ss12 Tanzanite crystals for the petals and 1 x ss9 Light Sapphire crystal for the flower centre. The actual crystals colour is a lot more vibrant for all of the crystals than you see in the images taken. The reason for this is the artificial lighting when taking pictures for the tutorial. I find that natural lighting on a bright cloudy day (diffuse lighting) gives the best and most accurate results for taking pics of the crystals. For this tutorial I have use a diffuse lighting box with 5 x 5000K white bulbs.

16. There are 4 of these flowers so require 20 x Tanzanite ss12 flat back crystals and 4 x ss9 Light Sapphire crystals to complete the flowers.

17. Flower no 7 is made from 5 x White Opal ss16 which is a milky white colour and 1 x ss9 Light Topaz crystals which is a warm yellow, to create a flower like a daisy.

18. There are 4 of these daisy flowers which require a total of 20 x ss16 White Opal crystals and 4 x ss10 Light Topaz crystals. Swarovski has such a huge range of colours its sometimes difficult to choose one colour over another. However, for the sake of this card we have tried to tone down the colours so that the card remains sparkle but not overly saturated with colour. Hence the choice of Opal colours and the lighter colour range of the shades used.

19. It’s the final and largest of the flower’s and the petals are made up from 5 x Light Rose ss20 crystals and 1 x ss16 Provence lavender for the centre of the flower.


20. Again, there are 4 of these flowers so require 20 x Light Rose ss20 flatback crystals and 4 x ss16 Provence lavender crystals to complete the flowers. That’s the final look complete!

Another Mother’s Day card we designed around a similar theme.
Many thanks for viewing our tutorial please feel free to comment or ask any questions down below.