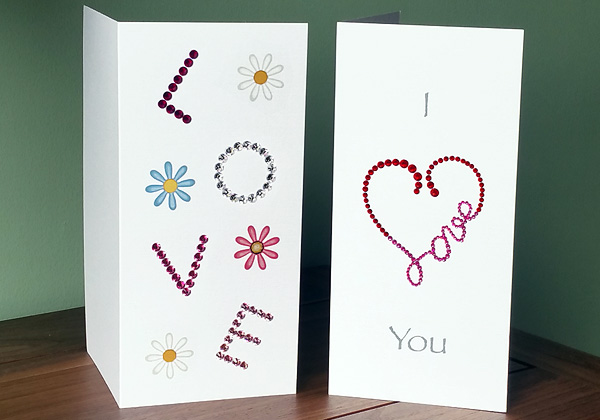
The completed Swarovski Valentines Daisy and Love Heart cards.
1. Swarovski Handmade Daisy Valentine’s Card Tutorial
This tutorial was created by Crystal and Glass Beads
If you create your own personalised handmade cards Swarovski flatback crystals can be the perfect addition for adding a bit of sparkle. Below you will find some ideas for creating Valentine’s Day Cards using 210 x 100mm greeting card blanks. The templates for printing the inserts and card outlines for both cards can be found below. The templates are also editable for copying and pasting the content onto larger or different shaped templates. You can use both HOTFIX or non-hotfix crystals for creating greetings cards but for the purpose of this tutorial we have used non-hotfix with a suitable adhesive.

1. What you will need:
- A … Download and print the template: Card template / insert template using 210 x 100mm greeting card blanks (Closed card size).
- B … A suitable adhesive, for this tutorial we are using Gemtac glue.
- C … A tool for picking up the crystals, Magic pick mini, Jewel setter, Katana tool or tweezers.
- D … A ruler or something with a straight edge is handy but not essential. I used to shuffle the crystals to turn them faceted face up rather than have to pick up each crystal to turn it over.
- E … A nail dotting tool, cocktail stick, orange stick, sharp pencil or something with a tip/point for applying small dots of adhesive.
- F … Flatback crystals Letter L … 10 x ss20 (5mm) Ruby flatback crystals, O … 18 x ss20 Clear Crystal, V … 13 x ss20 Rose crystals, E … 16 x ss20 Light Rose crystals, . You can find our range of Swarovski flatback crystals here.

2. Apply a small dab of adhesive to the centre of the letter L dots using a nail dotter, orange stick, cocktail stick etc.. Then apply the Ruby crystals using your pickup tool.

3. The Letter L takes 10 x ss20 (5mm) Ruby or whichever colour crystals you decide to use. Once the crystals are in place make sure to press them securely onto the adhesive with the end of the tool or an orange stick.

4. Apply some dabs of adhesive to the O dots and then using clear crystal ss20 flatbacks start adding crystals to the dots of adhesive, positioning them in place.

5. Once all the crystals are in place make any necessary minor adjustments to give a nice symmetrical letter O which will take 18 x ss20 Clear crystals.

6. Onto the letter V next and for this tutorial we have used Rose colour crystals.

7. That’s the letter V complete using 13 x Rose ss20 crystals.

8. For the last letter E we are going to use Light Rose crystals, but again you can substitute for any colour.

9. We used 16 x Light Rose ss20 crystals and that’s the card completed unless you would like to print out and trim down an insert for the card which you can download here.

Voila! .. . The completed Daisy handmade Valentine’s Day greeting card.
2. Swarovski Love Heart Valentine’s Day Greetings Card Tutorial
1. What you will need:
- A … Download and print the template: Card template / insert template using 210 x 100mm greeting card blanks (Closed card size).
- B … See above for tools required.
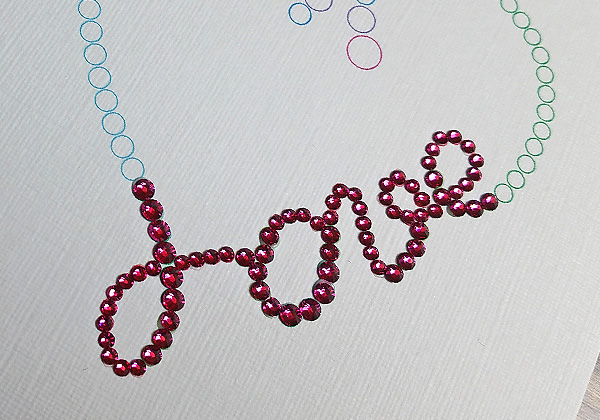
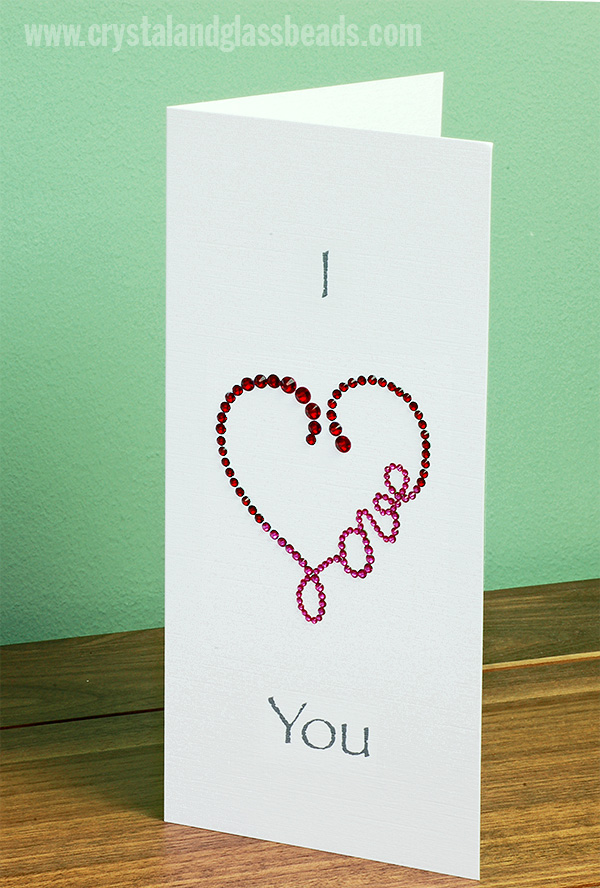
- C … Flatback crystals used…. We have used 2 colours Siam (red) for the heart and Fuchsia (hot pink) for the writing, but you can use just one colour of your choice for the card if you prefer. See quantities and sizes below for each colour. You can find the flatback crystals here.


2. As in the explanation above apply tiny glue dots to a few of the ss5 red dots as above.

3. Using the same process as used for the 1st card, add the first ss5 (1.8mm) Fuchsia pink crystals to the red spacer circles with glue dots.

4. Continue adding adhesive dots and crystallizing the ss5 red spacer circles, there are 48 x ss5 Fuchsia crystals required in total.

5. That’s all the red dots filled in and the ss5 Fuchsia crystals completed.

6. Next it’s the light green 2.2mm ss7 crystals again in Fuchsia unless you choose to use another colour. Add the glue dots and then position the crystal and press down securely into place (then make any tiny positioning adjustments). A total of 20 x ss7 Fuchsia flatback crystals are required.

7. Next it’s the dark green 2.6mm ss9 crystals again in Fuchsia, continuing the process as above. A total of 10 x ss9 Fuchsia flatback crystals are required.

8. Next it’s the light blue 3mm ss10 crystals again in Fuchsia, continuing the process as above. A total of 3 x ss10 Fuchsia flatback crystals are required. These are the last of the Fuchsia crystals that make up the word Love.

9. Now we are going to start with a new colour for the heart outline and for this tutorial we have used Siam which is a deep red colour. The smallest size for this colour crystal is represented by the dark green 2.6mm spacers, this time we are going to fill them with ss9 crystals in Siam (RED) unless you choose to use another colour. Add the glue dots and then position the crystal and press down securely into place (then make any tiny positioning adjustments). A total of 12 x ss9 Siam flatback crystals are required.

10. Next it’s the light blue 3.0mm ss10 crystals again in Siam. Add the glue dots then the crystals repeating the process as outlined above. A total of 16 x ss10 Siam flatback crystals are required.

11. Then comes the darker blue 3.2mm ss12 crystals again in Siam. Add the glue dots then the crystals repeating the process as outlined above. A total of 7 x ss12 Siam flatback crystals are required.

12. Finally the 2 remaining sizes first the purple 4mm ss16 crystals of which 5 x Siam 4mm crystals are required. Lastly it’s the pink 5mm ss20 spaces for which 4 x Siam ss20 crystals are required and there we are you can see the completed heart with the two colours used.

The completed Love Heart Swarovski crystallized handmade Valentine’s Day greetings card.
Many thanks for viewing our tutorial.

 Crystal and Glass Beads Blog Crystal and Glass Beads blog


