Equipment needed:
- Bowl of warm water with soap free hand wash (Can use normal hand wash if you don’t have soap free)
- Moisturiser
- Colour Nail varnish (or Clear if you prefer)
- Clear nail varnish
- Base coat nail varnish (optional)
- 1 x Orangewood stick
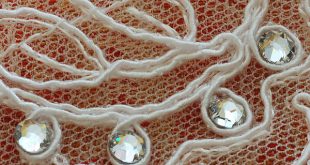
- Swarovski rhinestones ss5 (1.8mm perfect for nails) Spread the rhinestones out and make sure that they are all facing faceted side up.
- Water (Small amount to wet the stick)
- Clean Dry Towel
Prepare all your equipment in advance so that when it comes to doing your nails you wont be looking around for the items and will have plenty of time for completing each step.

Step 1.
a. Soak your hands in a bowl of warm water with soap free hand wash for 5-10 minutes, this will soften up your cuticles. Make sure that the water isn’t too hot or cold.
b. Gently dry your hands with a towel.

Step 2.
c. Apply a little moisturiser to each cuticle and gently rub in but not completely. You can use an orange stick, cotton wool or a cotton bud to do this.
d. Gently push the cuticles back on each finger with the rounded tip of an orange stick. (Don’t push too hard)
e. Rinse your hands to remove any moisturiser and then gently dry your hands.

Step 3.
f. (Optional) Paint your nails with a nail varnish base coat which will usually contain protein, vitamin E, aloe vera and some contain calcium. A base coat will also help protect dark colour polish from seeping into your nails and staining them, you can use a clear varnish if you don’t have a base coat.
g. Apply a thin coat of colour polish to cover your nails (if you are using a lighter colour you may have to apply a second coat to achieve the desired depth of colour).

Step 4.
h. Wet the pointed end of the orange stick which will make it easy to pick up a rhinestone.
i. Gently touch the top of a rhinestone with your orange stick to pick up the crystal. (you can use a tooth pick if you don’t have an orange stick and have skipped the cuticle step)

Step 5.
j. Place the rhinestone into the position required on your nail and gently press the rhinestone down. (nail varnish usually takes between 5-15 minutes to dry so make sure that the nail varnish is still tacky when applying the rhinestones (Please note: quick drying nail varnish drying time may be less.))
Step 6.
k. Repeat steps 4-5 until all the rhinestones are in place then leave the nails to dry.

Step 7.
l. Apply a clear coat of nail varnish over the complete nail including rhinestones to firmly bond the stones into place, this gives the nails a smooth surface to ensures that the rhinestones aren’t easily knocked off.

Step 8.
m. The end result is a set of beautiful Swarovski crystal nails that are perfect for parties, nights out or just adding some sparkle for Christmas.

 Crystal and Glass Beads Blog Crystal and Glass Beads blog


Great tutorial very useful for the Christmas season will give it a try, you make it look quite simple to do and the steps are very clear. Many thanks.
Enjoyed the nail tutorial, looks very simple to do. Have just ordered some rhinestones for something else, but am going to give the nails a try : )
Are the Swarovski rhinestones expensive? If so I take it they can be used again? I was just wondering whether or not the nail polish remover wrecks them. If they do then that means using a new set every time you decorate your nails. Being a bloke it seems wasteful but I reckon women look at this sort of thing differently.
If you are covering your nails yourself then its quite cheap, a small pack of crystals will be enough to cover quite a few nails and the nail vanish remover wont destroy them. They are glass crystal, so will be usable again, but they are so small and fiddly it may be easier to throw them than pick the nail vanish off them as each crystal is only 1.8mm in diameter.
Hi! Then how do I remove the crystals from my real nails?
Thanks! Lovely tutorial! 🙂
Hi Tammy depending on how they are applied you should be able to remove them by soaking your nails in warm soapy water for a few minutes to soften the glue nail or by using nail varnish remover and cotton wool.
just taken the cristal of with nail varnish no problem
Hi Wendy, in the salons they use Gel place the crystals onto the gel and then put the nails under a UV lamp which hardens the gel and secures the crystals firmly in place, but nail varnish does the trick and its easy to remove.